[Unreal Engine 5] 섹션4: Crypt Raider
섹션4: Crypt Raider
: 언리얼 엔진5에서 숨겨진 지하동굴에서 보물을 훔치는 게임을 제작해보자
<<
[Action Plan]
- Create our level design (including lighting)
- Make a "Mover" component for our doors
- Make a "Grabber" component for the player
- Call the Grabber functionality from Blueprint
- Create a "Pressure Plate" component
- Tweak and polish
프로젝트 셋업
① INFUSE 스튜디오 Medieval Dungeon Asset Pack 다운로드

② 프로젝트 생성 > Games > First Person > C++

③ File > New Level > Empty Level 생성

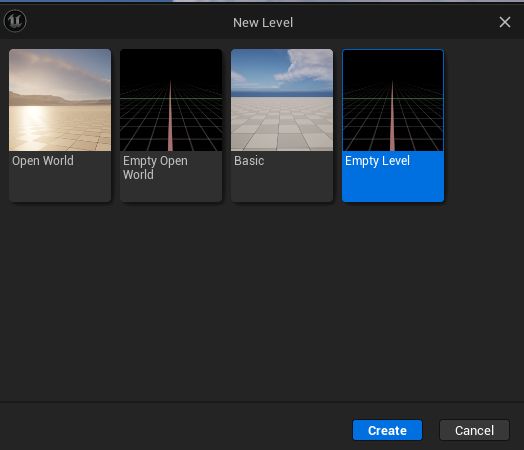
File > Save Level As > Dungeon

Settings > Project Settings > Maps & Modes > Dungeon을 기본값으로 설정

④ Content Drawer > Content > MedievalDungeon > Maps > Demonstration 열기

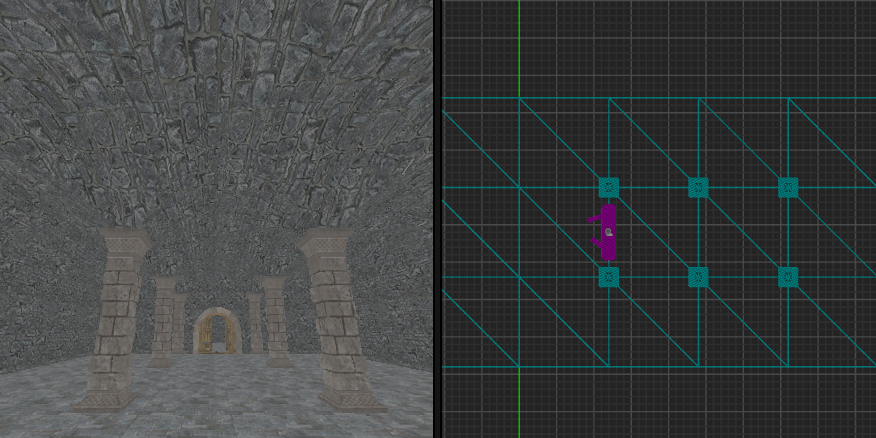
Modular Level Design
① Lit > Unlit 모드


→ 이러한 맵들은 모두 일정한 크기의 모듈 방식으로 만들어져 있다

바닥 > Details

② 뷰포트 분할모드에서 맵 모듈들의 크기 확인하기

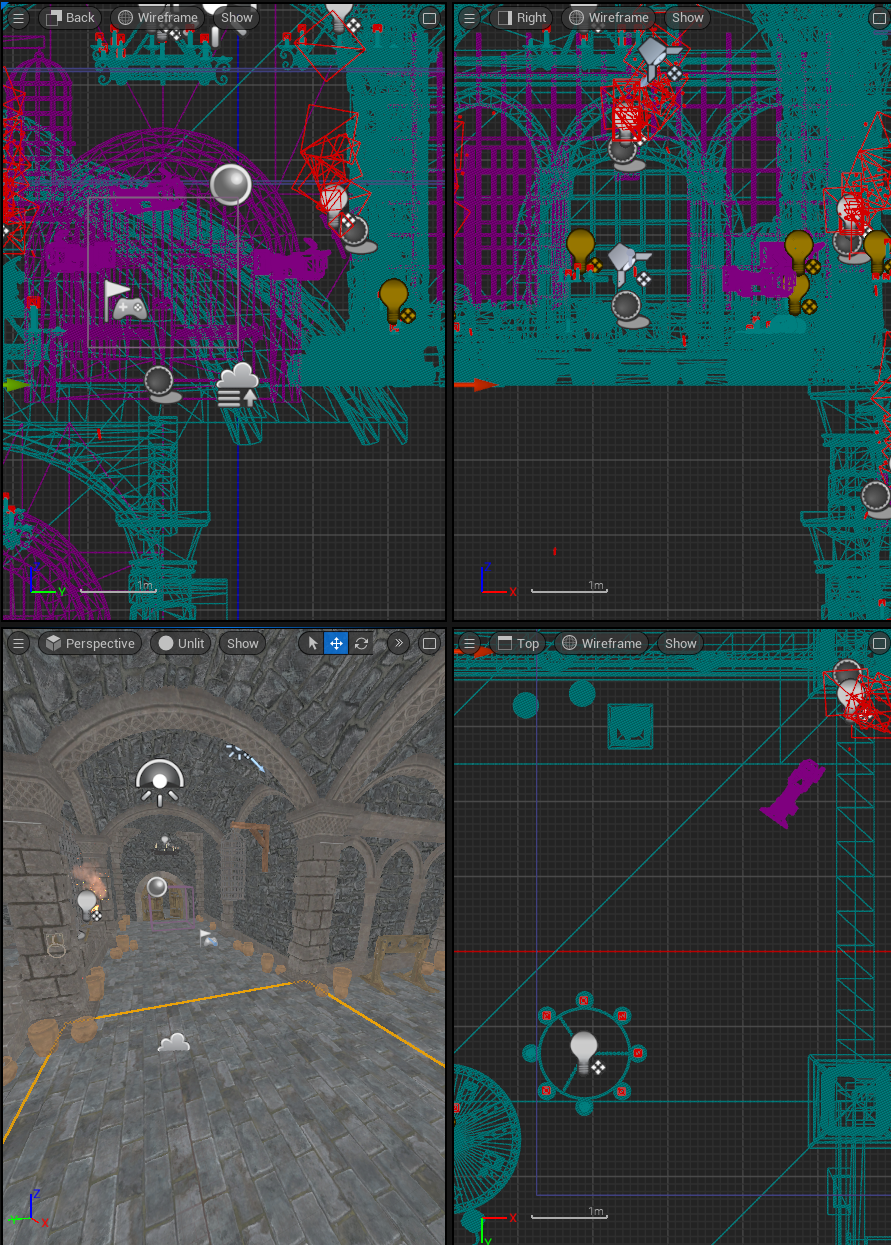
※ 마우스 휠 클릭 > Dist를 잴 수 있다

③ 나만의 Level을 디자인해보자

Modular Level Layout
Modular 방식으로 Level을 디자인해보자

① Content Drawer > SM_Floor 배치하기

② 뷰포트 우측 상단 >> 를 누른 후, Grid Snap Settings 100으로 변경

③ Alt키를 누른 채로, Floor 복사하기

- Outliner 폴더 정리하기

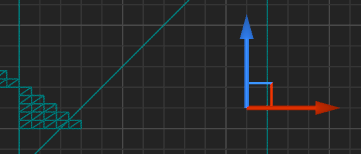
④ SM_Dungeon_Wall, Stairs, Floors 배치하기
- Wall 배치

- Wall 배치 후, Wall 높이에 Stairs을 맞추기 위해 Wall을 하나 가져다 놓는다

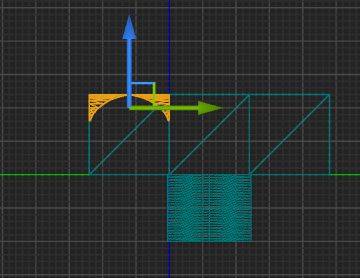
- Satirs 10 유닛 배치

- Floor 배치
 |
 |
→ Stair의 높이와 Floor가 딱 맞아 떨어지지지 않으므로, 3번째 계단 정도 아래는 Floor로 감춘다
- 마무리

Solution: Modular Level Layout
① SM_Ceiling, Dungeon_Doorway, SM_Pillar, SM_Arch, BP_Cell, Mausoleum 배치하기
- Ceiling

- Doorway

- Details > Door 회전시키기


- Pillar
→ 교차지점 마다 기둥들을 배치해준다
- Arch

- Cell

- 완성!

② Actors 정리하기
- Dungeon

※ Ctrl+Alt+Click 으로 원근뷰에서 객체를 선택할 수 있다
- Staircase

- Corridor

- Mausoleum

- 아래와 같이 폴더를 정리하였다

Light Types
빛 추가하기

- Point Light: 점 광원
- Spot Light: 특정 영역을 비추는 할로겐 램프같은 조명
- Rect Light: 사각 조명 (사무실)
- Directional Light: 태양광
- Sky Light: 구체에 적용되는 조명
① 조명 추가하기
▶ Content Drawer

▶ Engine 폴더가 추가된다
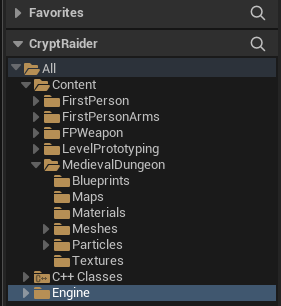
▶ Sky 검색 > BP_Sky_Sphere 추가


SkyLight > Recapture Scene

Directional Light > Directional Light Actor > Directional Light 스포이드로 지정

Refresh Material > 씬을 다시 그림

② Global 폴더에 정리

SkyLight 선택 후 Sky Light > Recapture


Lumen & Light Bleed
- Lumen 효과가 적용되지 않는 Material의 속성 변경이 필요하다

① Wall 선택 후 Details > Materials


_Inst 가 붙은 건 진짜 Material이 아니라는 걸 의미한다
마우스 우클릭 > Find Parent

- M_Tiling_Master라는 진짜 Material이 Content Drawer에 나타난다

더블클릭하면, 블루프린트 창이 열리고 여기서 Lumen이 지원하지 않는 Pixel Depth Offset의 연결을 해제한다

연결해제한 후 Apply

> Wall이 보기 좋은 상태로 변경된다

② Directional Light > Mobility

- Static: 객체 상태가 고정되어 변하지 않으므로, 게임 시작 전에 미리 조명 설정과 같은 작업을 마칠 수 있다.
- Stationary: 객체를 움직일 수는 없지만 밝기 등을 변경할 수 있다
- Movable: 모든 설정을 변경할 수 있다.
※ Lumen은 Movable일 때 제일 잘 작동한다
▶ Movable로 설정하면, 빛이 천장을 뚫고 던전 내부로 다 들어온다

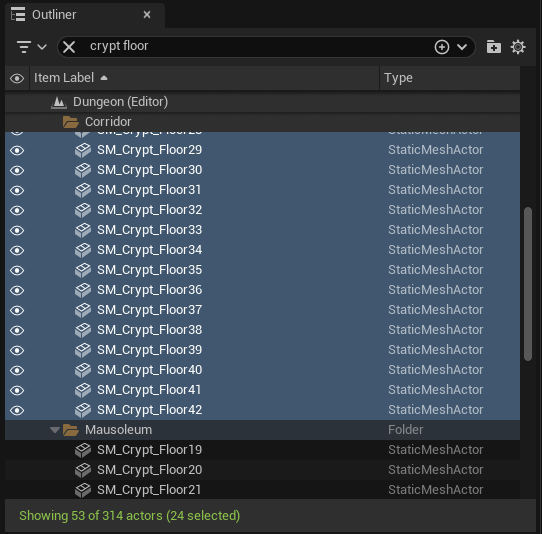
▶ 햇빛이 던전 내부로 들어오지 않게 하기 위해, Dungeon 폴더 내 floor를 검색해서 천장에 복사 붙여넣기 한다


③ Floor와 Wall의 간격을 메꾸기 위해 사이에 Edge Stones를 추가한다


- 복도영역도 동일하게 추가하기

- crypt floor를 검색해서 다른 영역도 추가하기

+ 이 외 여러 빛이 새어 들어오는 부분들을 Floor를 수직으로 회전시켜서 빛을 차단시켜 준다
Level Lighting
① BP_Torch 추가하기

② 블루프린트 클래스 생성

- Torch_PointLight > Cast Shadows 체크

받침의 그림자가 이상하다

- SM_Torch > Dynamic Shadow/Static Shadow 체크해제

- Light > Intensity 50

- Attenuation Radius: 횃불 빛이 퍼지는 반경

- 변경한 설정을 모든 블루프린트에 반영하기


③ BP_Chandelier 샹들리에 추가하기
- Add Point Light 체크


Character Blueprint
① SM_Floor 충돌 구현하기
- Show > Simple Collision

- Collision > Add Box Simplified Collision

- Primitives > Z Extent 값을 10으로 설정한 뒤 Center Z값 -10

② 케릭터 설정하기
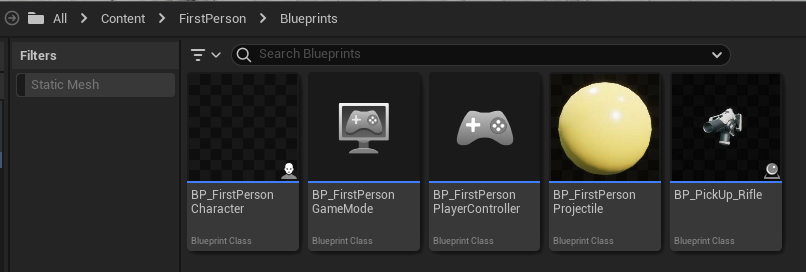
- FirstPerson > Character 새 블루프린트 생성
- 더블클릭 후 수정모드

- Mesh > Clear


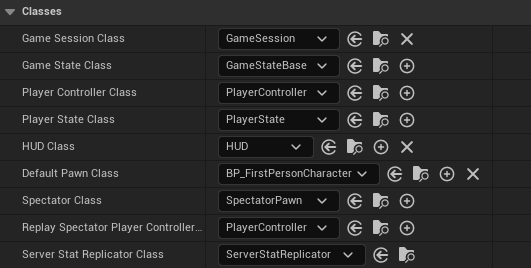
③ 게임 모드 생성하기
- 블루 프린트 > CryptRaiderGameMode


④ Default Pawn Class > BP_Player
Inheritance vs Composition
Inheritance?
A child class automatically has all the functionality of the parent. The child "is a" parent.
Composition?
Class A has an instance of Class B, it can choose to use it's functionality but doesn't have to. Class A "has a" Class B.

C++ Actor Component
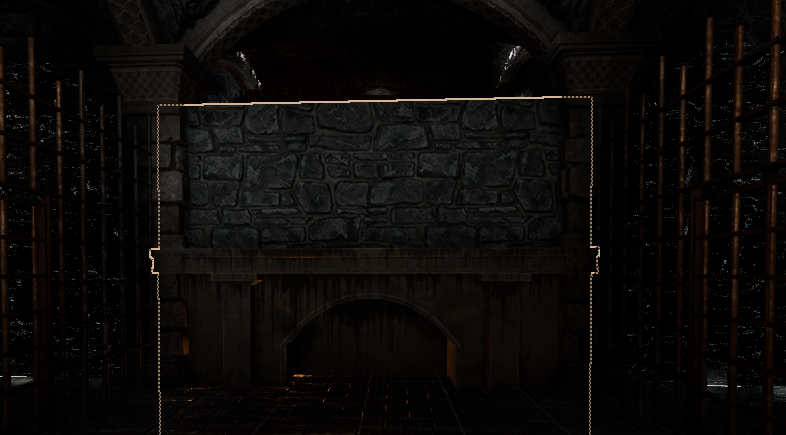
객체를 배치했을 때, 시야에서 사라지는 벽의 단면 추가하기
① Content Drawer > SM_Dungeon_Wall_Decorative_D 추가하기

② +ADD > New C++ Component

- Actor Component

- Mover 라고 명명
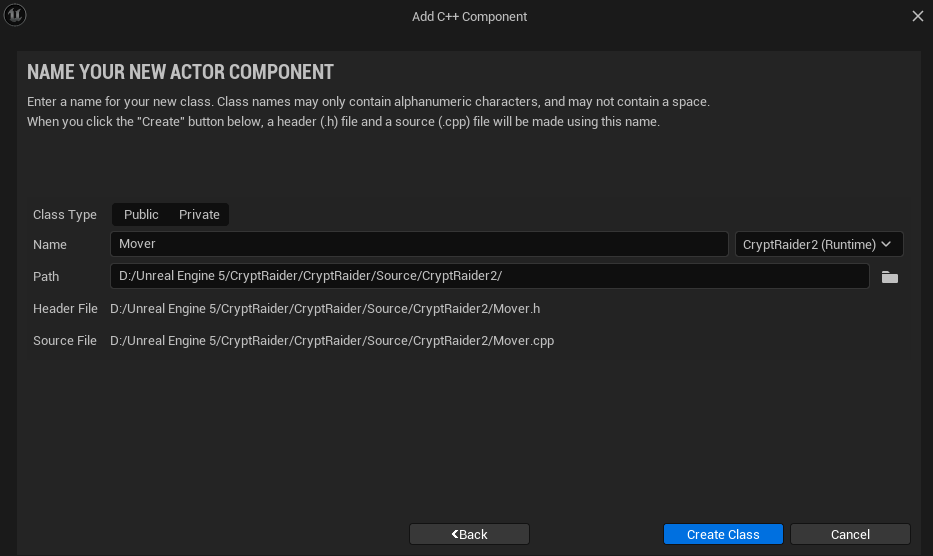
- Mover.h, Mover.cpp가 열리며, Class의 접두사에 U가 붙어 있는 것을 알 수 있다

- Mover.cpp 내 TickComponent에서 ulog 추가하기
UE_LOG(LogTemp, Display, TEXT("Mover is ticking!"));
※ ctrl + alt + F11을 누르면, 바로 UE5의 Live Coding을 진행할 수 있다

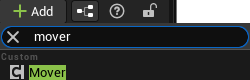
③ +Add > Mover 검색 후 추가하기
- 아래처럼 기존 StaticMeshComponent와 섹션이 구분된 채로 추가된다
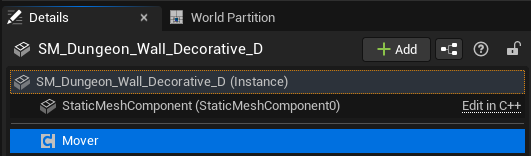
※ StaticMeshComponent는 서로 Attach 될 수 있는 Scene Component인 반면,
Actor Component는 단순히 리스트에 추가되기만 할 뿐이기 때문이다.
④ Play 버튼 > Mover is ticking 메시지가 출력 로그 창에 출력

Pointer Types & GetOwner()
Variable Addresses
- Variables require memory
- Memory location
Pointer?
사용중인 메모리에 대한 포인터 변수를 정의하면, 해당 메모리에 대한 주소만을 참조하여 값을 할당할 수 있다

실제 C++ 구문으로 표현하면?
AActor MyActor = ...;
AActor* YourActor;
YourActor = &MyActor;
Mover의 Actor 컴포넌트의 주소 출력하기
Actor 컴포넌트의 주소를 출력하기 위해선,
Actor 내 주소를 출력하는 함수인 GetOwner를 포인터형 변수로 할당하여 가져와야 한다.
- TickComponent 함수에 아래 코드 추가하기
AActor* Owner = GetOwner();
UE_LOG(LogTemp, Display, TEXT("Mover Owner Address: %u"), Owner);
- Ctrl + Alt + F11로 Live Coding > Actor 컴포넌트의 주소가 출력됨

※ Mover를 +Add할 때마다 메모리에 정보가 추가로 할당되므로, 효율성을 생각해서 데이터 복사본을 너무 많이 만들지 않는게 좋다
Dereferencing 역참조 & Arrow (->) Operator
Actor의 Location, 이름 등을 출력해보자
① TickComponent에 float형 변수 출력하기
float MyFloat = 5;
float* YourFloat = &MyFloat;
float FloatValue = *YourFloat;
UE_LOG(LogTemp, Display, TEXT("YourFloat Value: %f"), FloatValue);
※ 변수* vs *변수
*가 변수형의 뒤에 붙을 때: 포인터형 변수로 정의
*가 변수의 앞에 붙을 때: 해당 변수의 주소의 값을 출력
(C++ 강의에서 설명을 제대로 안해서 이게 제일 헷갈렸었는데, 갓픽 개발자가 아주 간단 명료하게 정리해줬다....)
- Play 버튼 클릭

※ 단, 실제 코드에서는 불필요한 중간 전달자를 생성하지 않고 아래와 같이 바로 *YourFloat과 같이 사용한다
float MyFloat = 5;
float* YourFloat = &MyFloat;
UE_LOG(LogTemp, Display, TEXT("YourFloat Value: %f"), *YourFloat);
② Actor의 Name 또는 Label 출력하기
AActor* Owner = GetOwner();
FString Name = Owner->GetActorNameOrLabel();

UE_LOG(LogTemp, Display, TEXT("Mover Owner: %s"), *Name);
* String 변수형에도 역참조 *로 값을 불러올 수 있다
- Play 버튼 클릭

③ Actor의 Location도 함께 출력하기
AActor* Owner = GetOwner();

//Name
FString Name = Owner->GetActorNameOrLabel();

//Location
FVector OwnerLocation = Owner->GetActorLocation();
FString OwnerLocationString = OwnerLocation.ToCompactString();

UE_LOG(LogTemp, Display, TEXT("Mover Owner: %s with location %s"), *Name, *OwnerLocationString);
- Play 버튼 클릭

Linkers, Headers and Includes
UE5에서 컴파일 하는 과정에 대해 알아보자
① 컴파일 단계

② 컴파일 코드 예시
아래의 과정은 특정 파일의 코드만 수정했을 때, 다른 코드들은 그대로 재사용할 수 있다는 점에서 효율적이다.

FMath::VInterpConstantTo
특정 조건을 만족했을 때, 아래로 내려가는 문을 제작해보자
① Mover.h의 private에 아래 변수 코드 추가
private:
	UPROPERTY(EditAnywhere)
	FVector MoveOffset;

	UPROPERTY(EditAnywhere)
	float MoveTime = 4;

	UPROPERTY(EditAnywhere)
	bool ShouldMove = false;

        FVector OriginalLocation;
② Mover.cpp에 전처리 지시자로 Math/UnrealMathUtility.h include
#include "Math/UnrealMathUtility.h"
③ BeginPlay와 TickComponent에 아래 코드들 추가
- BeginPlay: 시작 시점 Actor의 위치를 OriginalLocation에 저장 (Mover.h에 변수 미리 선언)
OriginalLocation = GetOwner()->GetActorLocation();
- TickComponent: VInterpConstantTo 함수에 사용될 인자들을 초기화
void UMover::TickComponent(float DeltaTime, ELevelTick TickType, FActorComponentTickFunction* ThisTickFunction)
{
	Super::TickComponent(DeltaTime, TickType, ThisTickFunction);

	FVector CurrentLocation = GetOwner()->GetActorLocation();
	FVector TargetLocation = OriginalLocation + MoveOffset;
	float Speed = FVector::Distance(OriginalLocation, TargetLocation) / MoveTime;

	FVector NewLocation = FMath::VInterpConstantTo(CurrentLocation, TargetLocation, DeltaTime, Speed);
	GetOwner()->SetActorLocation(NewLocation);

}
④ Mover Component의 Move Offset 값 수정
- Mover의 Move Offset의 Z값을 -600으로 설정

- Play버튼을 눌러 Mover를 움직이려고 하니, 아래와 같은 오류로그가 출력된다

- StaticMeshComponent의 Transform > Mobility 설정을 Movable로 변경

⑤ Play 버튼을 누르면 문이 내려가는 것을 알 수 있다
⑥ 위 코드가 bool형 ShouldMove 변수에 따라 작동하게끔 코드 수정
if(ShouldMove)
{
    FVector CurrentLocation = GetOwner()->GetActorLocation();
    FVector TargetLocation = OriginalLocation + MoveOffset;
    float Speed = FVector::Distance(OriginalLocation, TargetLocation) / MoveTime;

    FVector NewLocation = FMath::VInterpConstantTo(CurrentLocation, TargetLocation, DeltaTime, Speed);
    GetOwner()->SetActorLocation(NewLocation);
}
- 이제 Should Move를 체크하면 문이 내려간다

Scene Components
Scene Component 생성 후 다른 Component에 Attach 해보자
① 조각상 배치하기
- 철창 문 Open

- Spot Light 설치 후 조각상 배치


② BP_Player에 Scene Component 추가하기
- Content Drawer > Add/Import Content > New C++ Class

- Scene Component 선택
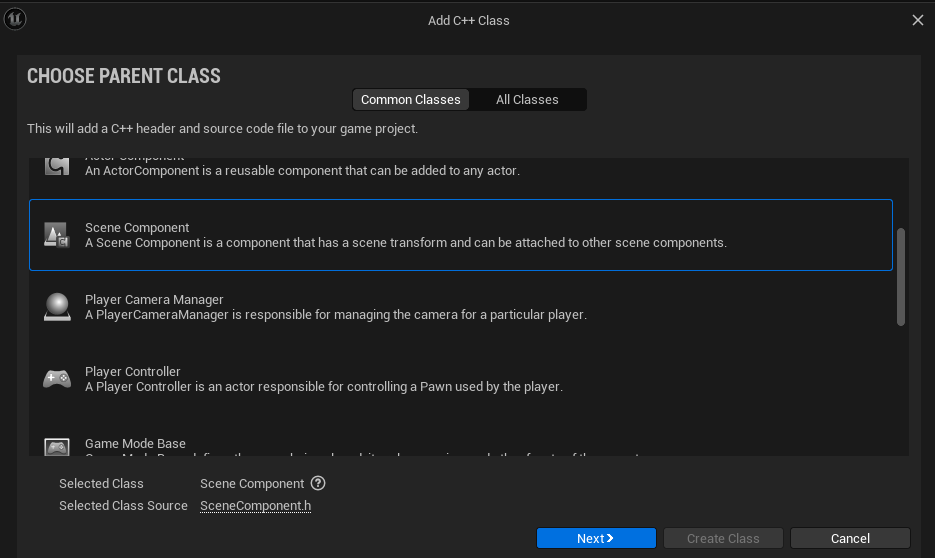
- Grabber.h와 Grabber.cpp 파일이 생성된 후 VSCode Open

- +Add > Camera Component에 Grabber 추가

③ Grabber.cpp 내 TickComponent에 아래 코드 추가
FRotator MyRotation = GetComponentRotation();
FString RotationString = MyRotation.ToCompactString();

UE_LOG(LogTemp, Display, TEXT("Grabber Rotaton: %s"), *RotationString);
- 컴파일 후 Play하면, 아래와 같이 케릭터의 카메라 Component의 회전값을 로그에 출력해준다

Line Tracing & Sweeping
Line Trace란?

Shape Trace란?

Trace Channel이란?

① 가고일 석상 > Details > Collision > Presets > Custom

② Trace 채널 설정하기
- Settings > Project Settings > Engine > Collision > New Trace Channel

- Default Response: Ignore로 설정
기본 오브젝트가 이 트레이스 채널에 반응하지 않도록 하기 위해 Ignore로 설정한다

- Editor를 재실행하면, 아래와 같이 Grabber가 추가된 것을 확인할 수 있다

③ 가고일 석상의 Grabber Response를 Block으로 설정

GetWorld()
UWorld란?
The World is the top level object representing a map or a sandbox in which Actors and Components will exist and be rendered.
① UWorld 가져오기
-Grabber.cpp에 아래 코드 추가하기
#include "Engine/World.h"

//Tick Component
float Time = GetWorld()->TimeSeconds;
UE_LOG(LogTemp, Display, TEXT("Current Time Is: %f"),Time);
② Compile 후 Play

→ 초 단위로 현재 시간이 출력된다
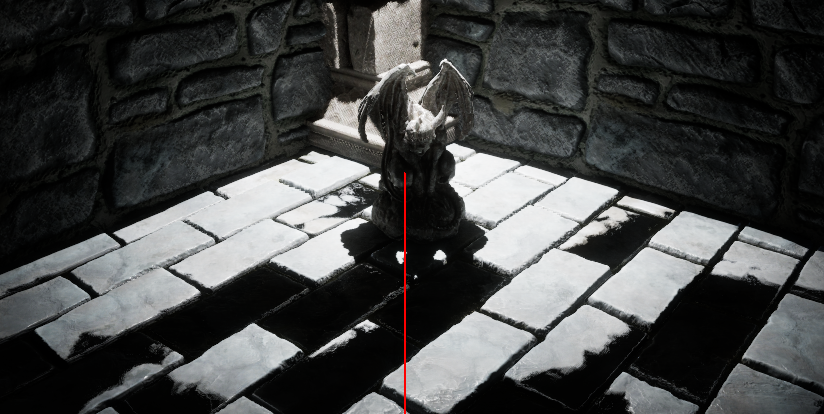
DrawDebugLine()
Line Trace를 가시화해주는 Line을 그려보자
① Grabber.cpp에 아래 코드 추가하기
#include "DrawDebugHelpers.h"

//Tick Component
FVector Start = GetComponentLocation();
FVector End = Start + GetForwardVector() * MaxGrabDistance;

DrawDebugLine(GetWorld(),Start,End,FColor::Red);
② Grabber.h에 아래 코드 추가하기
private:
	UPROPERTY(EditAnywhere)
	float MaxGrabDistance = 400;
③ Compile 후 Play
References & Pointers
포인터 vs 참조
| 포인터 | 참조 | |
| What is stored | 메모리 주소 | |
| Can be re-assigned (to another address) |
O | X |
| Can be null | O (nullptr) |
X (must be initialised) |
| Accessing contents | *ActorPtr | ActorRef |
| Accessing address | ActorPtr | &ActorRef |
| Changing the address | ActorPtr = &Actor | X |
| Changing the value | *ActorPtr = Actor | ActorRef = Actor |
① float형 참조를 활용하여 float 값 출력하기
- TickComponent에 아래코드 추가하기
float Damage = 0;
float& DamageRef = Damage;

UE_LOG(LogTemp, Display, TEXT("Damage: %f"),DamageRef);
- Play

② DamageRef의 Value를 변경한 후, 로그 출력해보기
float Damage = 0;
float& DamageRef = Damage;

DamageRef = 5;
UE_LOG(LogTemp, Display, TEXT("DamageRef: %f, Damage: %f"),DamageRef, Damage);

※ & vs * 요약
| Context | When Using | When Declaring | ||
| Code Examples | CopyOfActor = *ActorPtr; ActorAddress = &Actor; |
UActor* ActorPtr; UActor &ActorRef; |
||
| Symbol | * | & | * | & |
| Syntax | *ActorPtr | &Actor &ActorRef |
UActor* | UActor& |
| Meaning | Contents at ActorPtr |
Addrees of Actor or ActorRef |
Pointer to UActor | Reference to UActor |
Const References & Out Parameters
① Grabber.h에 PrintDamage()함수 추가하기
void PrintDamage(float& Damage);
② Grabber.cpp에 함수를 정의한 후, TickComponent에서 PrintDamage()
void UGrabber::PrintDamage(float& Damage)
{
	UE_LOG(LogTemp, Display, TEXT("Damage: %f"), Damage);
}
void UGrabber::TickComponent(float DeltaTime, ELevelTick TickType, FActorComponentTickFunction* ThisTickFunction)
{
float Damage = 5;
PrintDamage(Damage);
}
출력

③ PrintDamage 함수에서 Damage값을 변경하기
void UGrabber::TickComponent(float DeltaTime, ELevelTick TickType, FActorComponentTickFunction* ThisTickFunction)
{
	float Damage = 5;
	PrintDamage(Damage);
        UE_LOG(LogTemp, Display, TEXT("Original Damage: %f"), Damage);
}
void UGrabber::PrintDamage(float& Damage)
{
Damage = 2;
UE_LOG(LogTemp, Display, TEXT("Damage: %f"), Damage);
}
출력

④ const를 사용하면?
- Grabber.h
void PrintDamage(const float& Damage);→ 이 참조의 값은 변경할 수 없다
- Grabber.cpp
void UGrabber::PrintDamage(const float& Damage)
{
	//Damage = 2;
	UE_LOG(LogTemp, Display, TEXT("Damage: %f"), Damage);
}
출력

⑤ 비상수 참조를 아웃 매개변수로 활용하기
- Grabber.h
bool HasDamage(float& OutDamage);→ 새로운 비상수형 bool 선언, 매개 변수 이름이 Out으로 시작한다면 아웃 매개변수다.
- Grabber.cpp
1. TickComponent 함수에 if문 작성
void UGrabber::TickComponent(float DeltaTime, ELevelTick TickType, FActorComponentTickFunction* ThisTickFunction)
{
	float Damage;

	if(HasDamage(Damage))
	{
		PrintDamage(Damage);
	}
}
→ 선언되었지만 값을 받지 못하고 즉시 함수로 전달된 변수가 있다면, 아웃 배개변수가 있을 수도 있다
2. HasDamage 내 비상수 참조 OutDamage 초기화
bool UGrabber::HasDamage(float& OutDamage)
{
	OutDamage = 5;
	return true;
}
출력

Geometry Sweeping
- SweepSingleByChannel

① Grabber.h에 GrabRadius 변수 초기화
UPROPERTY(EditAnywhere)
float GrabRadius = 100;
② Grabber.cpp의 TickComponent에 SweepSingleByChannel 함수 활용
FCollisionShape Sphere = FCollisionShape::MakeSphere(GrabRadius);
FHitResult HitResult;
bool HasHit = GetWorld()->SweepSingleByChannel(
    HitResult,
    Start, End,
    FQuat::Identity,
    ECC_GameTraceChannel2,
    Sphere
);
→ HitResult가 아웃매개변수임을 나타내기 위해 bool정의 바로 위에 위치시킴
※FQuat::Identity
→ 회전이 없다는 것을 나타내는 수학적 표현
※ TraceChannel 찾기
프로젝트 폴더 내 config>DefaultEngine.ini에서 Grabber 검색

→ ECC_GameTraceChannel2
- 가고일 석상을 가리킬 때와 아닐 때를 구분하기 위해 if문 사용
if(HasHit)
{
    AActor* HitActor = HitResult.GetActor();
    UE_LOG(LogTemp, Display, TEXT("Hit actor: %s"),*HitActor->GetActorNameOrLabel());
}

else
{
    UE_LOG(LogTemp, Display, TEXT("No actor hit"));
}
출력

Input Action Mappings
① Settings>Project Settings>Engene>Input>Action Mappings
- Grab 추가하기

② Content Drawer>BP_Player>블루프린트에서 Grab 불러오기
출력

Blueprint Callable
블루프린트에 C++ 함수 활용하기
① Grabber.h에 아래 코드 추가
UFUNCTION(BlueprintCallable)
void Release();
② Grabber.cpp에 Release 함수 정의
void UGrabber::Release()
{
	UE_LOG(LogTemp, Display, TEXT("Released grabber"));
}
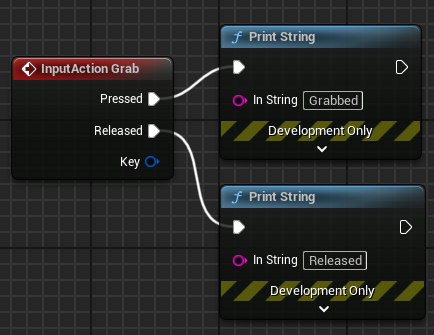
③ BP_Player 블루 프린트 작성
- Grabber를 드래그앤드롭한 후 Release 함수를 불러온 후 Exec Pin을 연결한다

※ Live Coding을 하면 Editor에서 안 나타날 때가 있으므로 Editor를 종료한 후 다시 Ctrl+Shift+B를 눌러 Win64 Development Build로 빌드한다
출력

④ Grab함수에 지금까지 작성한 코드 붙여넣기
- Grabber.h에 Grab함수 추가
UFUNCTION(BluepringCallable)
void Grab();
- Grabber.cpp에 아래 코드 옮기기
void UGrabber::Grab()
{
	FVector Start = GetComponentLocation();
	FVector End = Start + GetForwardVector() * MaxGrabDistance;

	DrawDebugLine(GetWorld(),Start,End,FColor::Red);


	FCollisionShape Sphere = FCollisionShape::MakeSphere(GrabRadius);
	FHitResult HitResult;
	bool HasHit = GetWorld()->SweepSingleByChannel(
		HitResult,
		Start, End,
		FQuat::Identity,
		ECC_GameTraceChannel2,
		Sphere
	);


	if(HasHit)
	{
		AActor* HitActor = HitResult.GetActor();
		UE_LOG(LogTemp, Display, TEXT("Hit actor: %s"),*HitActor->GetActorNameOrLabel());
	}

	else
	{
		UE_LOG(LogTemp, Display, TEXT("No actor hit"));
	}
}
⑤ 블루프린트에 Grab 추가

출력

FindComponentByClass() & nullptr
- UPhysicsHandleComponent
① 블루프린트에서 PhysicsHandle 추가하기

→ Scene이 아닌 Actor Component
② Grabber.cpp에 UPhysicsHandleComponent 추가하기
- 헤더파일 추가
#include "PhysicsEngine/PhysicsHandleComponent.h"
- BeginPlay 함수에 아래 코드 추가
UPhysicsHandleComponent* PhysicsHandle = GetOwner()->FindComponentByClass<UPhysicsHandleComponent>();
PhysicsHandle = nullptr;
PhysicsHandle->GetName();
※ <>: 컴파일할 때 전달되는 인수 / (): 실행할 때 전달되는 인수
출력

→ PhysicsHandle이 nullptr일 때 ->를 사용할 경우 엔진이 충돌한다
- BeginPlay 코드 수정
void UGrabber::BeginPlay()
{
	Super::BeginPlay();

	UPhysicsHandleComponent* PhysicsHandle = GetOwner()->FindComponentByClass<UPhysicsHandleComponent>();

	if(PhysicsHandle != nullptr)
	{
		UE_LOG(LogTemp, Display, TEXT("Got Physics Handle: %s"),*PhysicsHandle->GetName());
	}

	else
	{
		UE_LOG(LogTemp, Warning, TEXT("No Physics Handle Found!"));
	}
}
출력

- PhysicsHandle을 삭제한 후 플레이 버튼

DrawDebugSphere()
여러 FVector의 위치를 시각화할 수 있도록 디버그 구체를 그려보자

① DrawDebugSphere 구현하기

- Grab함수에 아래 코드를 추가한다
DrawDebugSphere(GetWorld(),End,10,10,FColor::Blue,false,5);
- 마우스 왼쪽 클릭 시 파란색 디버그 구체가 나타난다

② if구문 내 DrawDebugSphere 구현하기
if(HasHit)
{
	//DrawDebugSphere 추가
    DrawDebugSphere(GetWorld(),HitResult.Location,10,10,FColor::Green,false,5);
    DrawDebugSphere(GetWorld(),HitResult.ImpactPoint,10,10,FColor::Red,false,5);

    AActor* HitActor = HitResult.GetActor();
    UE_LOG(LogTemp, Display, TEXT("Hit actor: %s"),*HitActor->GetActorNameOrLabel());
}
- 가고일 석상 근처에서 마우스 왼쪽클릭

→ ImpactPoint(빨강)에 도달할 때 석상을 건드리도록 설정
Grabbing With Physics Handle
Grabber.cpp에 GrabComponentAtLocationWithRotation 호출하기

① Grab함수에 첫 부분에서 Early Return
UPhysicsHandleComponent* PhysicsHandle = GetOwner()->FindComponentByClass<UPhysicsHandleComponent>();
if(PhysicsHandle==nullptr)
{
    return;
}
→ PhysicsHandle이 nullptr일 때 바로 반환되며, 함수의 나머지 부분이 실행되지 않는다
② if구문에서 HasHit할 때 GrabComponentAtLocationWithRotation 구문 추가
if(HasHit)
{
    PhysicsHandle->GrabComponentAtLocationWithRotation(
        HitResult.GetComponent(),
        NAME_None,
        HitResult.ImpactPoint,
        GetComponentRotation()
    );
}
→ FName은 스켈레탈 메시인 경우에 설정, 지금은 스태틱 메시이므로 NAME_None
③ TickComponent에 SetTargetLocationAndRotation 선언
- Grabber.h에 잡았을 때의 거리를 설정하기 위한 새로운 float형 거리변수 초기화
UPROPERTY(EditAnywhere)
float HoldDistance = 200;
- Tick상황에서도 PhysicsHandle 포인터의 Early Return 코드를 추가한 후, SetTargetLocationAndRotation 호출
void UGrabber::TickComponent(float DeltaTime, ELevelTick TickType, FActorComponentTickFunction* ThisTickFunction)
{
	Super::TickComponent(DeltaTime, TickType, ThisTickFunction);

	UPhysicsHandleComponent* PhysicsHandle = GetOwner()->FindComponentByClass<UPhysicsHandleComponent>();
	if(PhysicsHandle==nullptr)
	{
		return;
	}

	FVector TargetLocation = GetComponentLocation() + GetForwardVector() * HoldDistance;
	PhysicsHandle->SetTargetLocationAndRotation(TargetLocation, GetComponentRotation());
}
④ 가고일 석상 Transform>Mobility>Movable로 설정, Physics>Simulate Physics 체크


플레이

⑤ Grabber.h에 GetPhysicsHandle 함수 추가
- PhysicsEngine관련 헤더파일 include하기
#include "CoreMinimal.h"
#include "Components/SceneComponent.h"
#include "PhysicsEngine/PhysicsHandleComponent.h"

#include "Grabber.generated.h"
→ Grabber.generated.h가 맨 마지막에 가도록 위치
- private에 상수형 GetPhysicsHandle함수 선언
UPhysicsHandleComponent* GetPhysicsHandle() const;
⑥ Grabber.cpp에 GetPhysicsHandle 정의
- BeginPlay 함수에 있던 코드 삭제
void UGrabber::BeginPlay()
{
	Super::BeginPlay();

}
- GetPhysicsHandle 정의
UPhysicsHandleComponent* UGrabber::GetPhysicsHandle() const
{
	UPhysicsHandleComponent* Result = GetOwner()->FindComponentByClass<UPhysicsHandleComponent>();
	if(Result == nullptr)
	{
		UE_LOG(LogTemp, Error, TEXT("Grabber requires a UPhysicsHandleComponent"));
	}
	return Result;
}
실행

Waking Physics Objects
물리엔진을 다시 깨우는 방법을 알아보자
→ 컴포넌트를 깨운 후 일정시간이 지나면 물리엔진은 슬립상태로 돌아간다
① UPrimitiveComponent
- Grabber.cpp 내 Grab함수 if구문 코드 변경
if(HasHit)
{
    UPrimitiveComponent* HitComponent = HitResult.GetComponent();
    HitComponent->WakeAllRigidBodies();
    PhysicsHandle->GrabComponentAtLocationWithRotation(
        HitComponent,
        NAME_None,
        HitResult.ImpactPoint,
        GetComponentRotation()
    );
}
② GetGrabbedComponent
- Grabber.cpp 내 Release 함수 수정
void UGrabber::Release()
{
	UPhysicsHandleComponent* PhysicsHandle = GetPhysicsHandle();
	if(PhysicsHandle == nullptr)
	{
		return;
	}

	if(PhysicsHandle->GetGrabbedComponent() != nullptr)
	{
		PhysicsHandle->GetGrabbedComponent()->WakeAllRigidBodies();
		PhysicsHandle->ReleaseComponent();
	}
}
- TickComponent 함수 수정
UPhysicsHandleComponent* PhysicsHandle = GetOwner()->FindComponentByClass<UPhysicsHandleComponent>();
if(PhysicsHandle==nullptr)
{
    return;
}

if(PhysicsHandle->GetGrabbedComponent != nullptr)
{
    FVector TargetLocation = GetComponentLocation() + GetForwardVector() * HoldDistance;
    PhysicsHandle->SetTargetLocationAndRotation(TargetLocation,GetComponentRotation());
}
③ 가고일 석상과 플레이어 충돌문제 해결
가고일 석상 Details>Pawn>Overlap

Returning Out Parameters
코드를 리팩토링해보자
① Grabber.h에 GetGrabbableInReach 함수 원형 제공
bool GetGrabbableInReach(FHitResult& OutHitResult) const;
② Grabber.cpp에 함수 정의
bool UGrabber::GetGrabbableInReach(FHitResult& OutHitResult) const
{
	FVector Start = GetComponentLocation();
	FVector End = Start + GetForwardVector() * MaxGrabDistance;

	DrawDebugLine(GetWorld(),Start,End,FColor::Red);
	DrawDebugSphere(GetWorld(),End,10,10,FColor::Blue,false,5);

	FCollisionShape Sphere = FCollisionShape::MakeSphere(GrabRadius);
	//FHitResult HitResult;
	return GetWorld()->SweepSingleByChannel(
		OutHitResult,
		Start, End,
		FQuat::Identity,
		ECC_GameTraceChannel2,
		Sphere);
}
→ FHitResult형의 HitResult를 새로 정의할 필요 없이 바로 return하도록 코드 최적화 (메모리 낭비 ↓)
Overlap Events

| Object A | ||||
| Ignore | Overlap | Block | ||
| Object B | Ignore | Ignore | Ignore | Ignore |
| Overlap | Ignore | Overlap | Overlap | |
| Block | Ignore | Overlap | Block | |
- 가고일 석상의 Object Responses

-BP_Player의 Capsule Component의 Collision Presets


① 지하감옥 벽의 블루프린트 서브클래스 생성

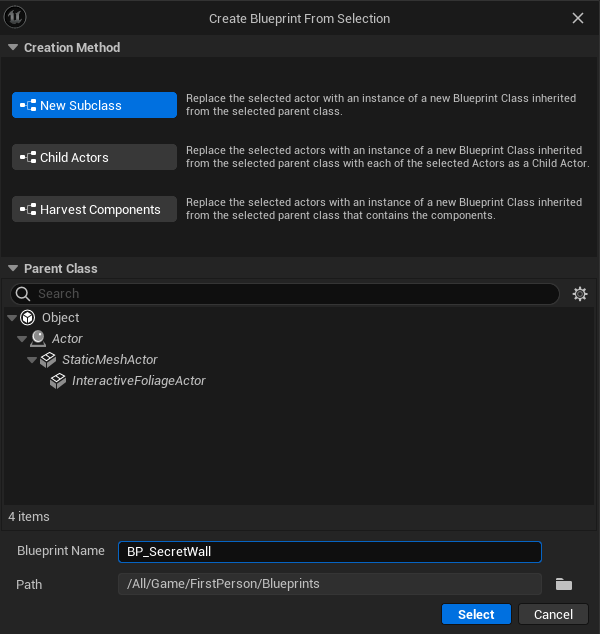
※ Blueprint Subclass 생성 시 Editor가 멈추는 현상이 자주 발생하는데, 이 경우 다른 블루프린트 창을 Open한 후 창에 도킹한 뒤 생성을 하면 멈춤 현상이 발생하지 않는다.
② BP_SecretWall 설정하기
- 박스 콜리전 컴포넌트 추가

- 박스 크기 수정
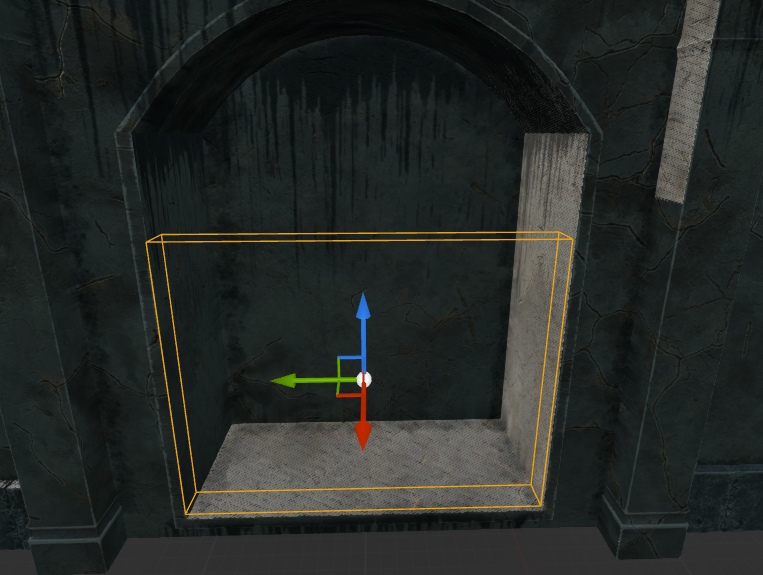
- Collision Presets > Custom

→ 대부분 Overlap으로 설정되어 있다.
다시 Default세팅인 OverlapAllDynamics로 설정을 되돌린 뒤, 이벤트 그래프로 간다
- Add On Component Begin Overlap 추가
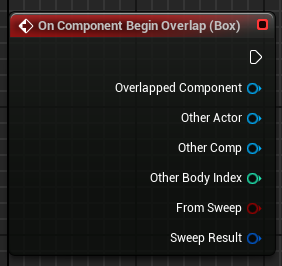
- Box 이름을 Trigger Area로 변경

- 아래와 같이 블루프린트 생성

- Trigger Area와 접촉하게 되면 아래와 같이 Actor의 Name이 출력된다

- Spot Light 컴포넌트 추가

③ 오버랩 이벤트 설정 맞춰주기
- 가고일 오버랩 이벤트 생성 옵션 활성화

-플레이한 후 가고일 석상을 Trigger Area로 갖다 놓으면 아래처럼 출력

④ Trigger Area를 C++ 컴포넌트로 생성하기

- All Classes>Box Component

-TriggerComponent

→ TriggerComponent.h와 cpp 파일 생성 완료!
⑤ TriggerComponent.h/ TriggerComponent.cpp 코드 작성
- TriggerComponent.h

→ UCLASS() 안에 아무것도 없다
반면 Grabber.h를 보면,

이 코드를 복사해서 가져오면 블루프린트에서 해당 컴포넌트를 생성할 수 있다.
그리고 추가로 BeginPlay() 설정도 복사해서 가져온다.

- TriggerComponent.cpp
마찬가지로, BeginPlay 함수 코드도 TriggerComponent.cpp에 가져온다

- UGrabber>UTriggerComponent
#include "TriggerComponent.h"

// Called when the game starts
void UTriggerComponent::BeginPlay()
{
	Super::BeginPlay();

    UE_LOG(LogTemp, Display, TEXT("Trigger Component Alive"));
}
⑥ BP_SecretWall 블루프린트로 돌아와 trigger 추가하기

- Trigger 우클릭 후 Add On Component Begin Overlap하여 다시 연결

- Trigger 박스의 크기를 수정한 후 플레이하여 다시 가고일 석상을 가져가면, 잘 작동하는 것을 알 수 있다.
Constructors
① Tick Component 함수 정의하기
- TriggerComponent.h에 TickComponent원형 제공
public:
	// Called every frame
	virtual void TickComponent(float DeltaTime, ELevelTick TickType, FActorComponentTickFunction* ThisTickFunction) override;
- TriggerComponent.cpp에 TickComponent 정의
 void UTriggerComponent::TickComponent(float DeltaTime, ELevelTick TickType, FActorComponentTickFunction* ThisTickFunction)
 {
    Super::TickComponent(DeltaTime, TickType, ThisTickFunction);

    UE_LOG(LogTemp, Display, TEXT("Trigger Component Is Ticking"));

 }
→ 플레이 버튼을 해도 Tick이 활성화되지 않는다
※ 최적화 측면에서 언리얼의 대부분 컴포넌트는 자동으로 Tick이 비활성화 되어 있다.
(Actor는 활성화)
Mover.cpp를 보면,

Tick의 기본값이 활성화되어 있음을 알 수 있다.
② TriggerComponent 생성자 만들기
Mover.h를 보면,

public 영역에 Mover이름과 동일한 UMover(); 생성자가 있는 것을 알 수 있다. TriggerComponent.h도 동일하게 설정해준다.
- TriggerComponent.h
public:
	UTriggerComponent();
- TriggerComponent.cpp
UTriggerComponent::UTriggerComponent()
{
	PrimaryComponentTick.bCanEverTick = true;

    UE_LOG(LogTemp, Display, TEXT("Constructing"));
}
플레이


→ 플레이 전에 Constructing 되는 것에 주의 (Play 전 월드가 먼저 생성되어야 하므로)
TArray
TArray<Type>
| Type | Type | Type | Type |
※Type 예시
- TArray<AActor*>

① TickComponent에 GetOverlappingActors 함수 추가
 void UTriggerComponent::TickComponent(float DeltaTime, ELevelTick TickType, FActorComponentTickFunction* ThisTickFunction)
 {
    Super::TickComponent(DeltaTime, TickType, ThisTickFunction);

    TArray<AActor*> Actors;
    GetOverlappingActors(Actors);
 }
- TArray로 뭘 할 수 있을까?
1. 배열 항목의 개수를 쿼리할 수 있다
Array.Num() == 5
2. 각 배열의 항목에 접근할 수 있다
Arr[0], Arr[1], Arr[2], Arr[3], Arr[4],
② TickComponent에서 TArray를 사용하여 Actor의 이름을 출력
 void UTriggerComponent::TickComponent(float DeltaTime, ELevelTick TickType, FActorComponentTickFunction* ThisTickFunction)
 {
    Super::TickComponent(DeltaTime, TickType, ThisTickFunction);

    TArray<AActor*> Actors;
    GetOverlappingActors(Actors);

    if(Actors.Num() > 0)
    {
        FString ActorName = Actors[0]->GetActorNameOrLabel();
        UE_LOG(LogTemp, Display, TEXT("Overlapping: %s"),*ActorName);
    }
 }
-플레이 후 BP_SecretWall에 Player가 접근할 때

While & For Loops
여러 개의 Actors가 감지되었을 때도 출력되도록 코드를 변경해보자
① TickComponent if구문을 while문으로 변경
int32 index = 0;
while (index < Actors.Num())
{
    FString ActorName = Actors[index]->GetActorNameOrLabel();
    UE_LOG(LogTemp, Display, TEXT("Overlapping: %s"),*ActorName);
    ++index;
}
-가고일석상과 플레이어가 동시에 Trigger와 overlap될 경우

② TickComponent while문을 for문으로 변경
for (int32 i = 0; i < Actors.Num(); i++)
{
    FString ActorName = Actors[i]->GetActorNameOrLabel();
    UE_LOG(LogTemp, Display, TEXT("Overlapping: %s"),*ActorName);
}
Range Based For Loops
TickComponent의 for문을 범위기반 For문으로 변경하기
TArray<AActor*> Actors;
GetOverlappingActors(Actors);

for(AActor* Actor : Actors)
{
    FString ActorName = Actor->GetActorNameOrLabel();
    UE_LOG(LogTemp, Display, TEXT("Overlapping: %s"),*ActorName);
}
Actor Tags
가고일 석상에만 반응하는 문을 제작해보자
① 가고일 석상>Details>Actor>Tags에 Unlock1 추가

② for 구문 수정: "Unlock"이라는 태그를 가진 Actor에만 ulog를 출력
for(AActor* Actor : Actors)
{
    if(Actor->ActorHasTag("Unlock1"))
    {
        UE_LOG(LogTemp, Display, TEXT("Unlocking"));
    }
}
- 가고일 석상을 가져다 대면

③ Unlock1이란 정확한 키워드에 맞추는 식의 하드코딩이 아닌 태그 부여방식으로 코드 수정
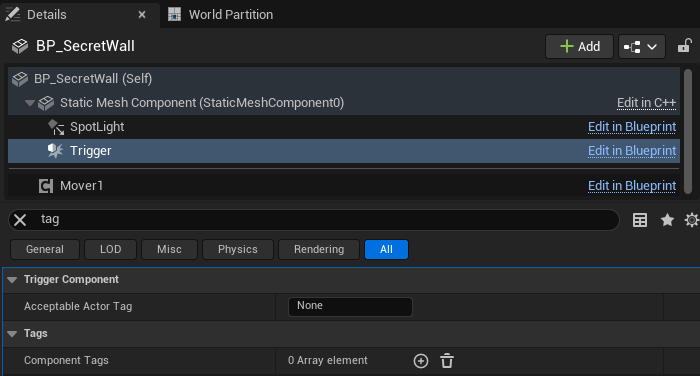
- TriggerComponent.h에 FName 변수 추가
private:
	UPROPERTY(EditAnywhere)
	FName AcceptableActorTag;
- TriggerComponent.cpp Tag 인식 코드 수정
for(AActor* Actor : Actors)
{
    if(Actor->ActorHasTag(AcceptableActorTag))
    {
        UE_LOG(LogTemp, Display, TEXT("Unlocking"));
    }
}
④ BP_SecretWall의 Trigger Details에서 tag를 검색하면 아래와 같이 나온다
Early Returns
① GetAcceptableActor 함수 구현하기
- TriggerComponent.h에 GetAcceptableActor 원형 제공
private:
    AActor* GetAcceptableActor() const;
- TriggerComponent.cpp에 GetAcceptableActor 정의
AActor* UTriggerComponent::GetAcceptableActor() const
{
    AActor* ReturnActor = nullptr;

    TArray<AActor*> Actors;
    GetOverlappingActors(Actors);

    for(AActor* Actor : Actors)
    {
        if(Actor->ActorHasTag(AcceptableActorTag))
        {
            ReturnActor = Actors;
        }
    }

    return ReturnActor;
}
→ 구현할 수는 있으나 for문을 전체 실행해야 하므로 비효율적이다
- 보다 효율적인 GetAcceptableActor 함수 코드
AActor* UTriggerComponent::GetAcceptableActor() const
{
    TArray<AActor*> Actors;
    GetOverlappingActors(Actors);

    for(AActor* Actor : Actors)
    {
        if(Actor->ActorHasTag(AcceptableActorTag))
        {
            return Actor;
        }
    }

    return nullptr;
}
② TickComponent에 if구문 추가하기
AActor* Actor = GetAcceptableActor();
if(Actor != nullptr)
{
    UE_LOG(LogTemp, Display, TEXT("Unlocking"));
}
else
{
    UE_LOG(LogTemp, Display, TEXT("Relocking"));
}
- 플레이 후 가고일 석상을 넣었다 뺐을 때

Dependency Injection
TriggerComponent에 의존성을 주입해보자
Grabber.cpp는 PhysicsHandle에 대한 의존성을 가지고 있다. PhysicsHandle이 주변에 없다면 작동하지 않는다.

① TriggerComponent.h에 Mover와 연결할 수 있는 헤더, 함수,변수 선언
#include "Mover.h"

public:
	UFUNCTION(BlueprintCallable)
	void SetMover(UMover* Mover);

private:
	UMover* Mover;
② TriggerComponent.cpp에 함수 정의
void UTriggerComponent::SetMover(UMover* NewMover)
{
    Mover = NewMover;//Shadowing 기법
}
※ Shadowing 기법: 인풋 변수로 사용된 변수명과 지역 변수명이 다르도록 설정해야 한다
③ BP_SecretWall 블루프린트에서 SetMover 추가

④ Mover에 SetShouldMove함수 추가하기
- Mover.h
public:
	void SetShouldMove(bool ShouldMove);

private:
	bool ShouldMove = false;
- Mover.cpp
void UMover::SetShouldMove(bool NewShouldMove)
{
	ShouldMove = NewShouldMove;
}
⑤ TriggerComponent.cpp의 TickComponent에서 적절한 Actor가 들어왔을 때의 코드 수정
AActor* Actor = GetAcceptableActor();

if(Actor != nullptr)
{
    Mover->SetShouldMove(true);
}
else
{
   Mover->SetShouldMove(false);
}
Casting & Actor Attachment
AActor::AttachToComponent
- Actor Component가 루트 컴포넌트인지 확인 후 SecretWall과 부착하기
AActor* Actor = GetAcceptableActor();

if(Actor != nullptr)
{
	UPrimitiveComponent* Component = Cast<UPrimitiveComponent>(Actor->GetRootComponent());

    if(Component != nullptr)
    {
    	Component->SetSimulatePhysics(false);
    }
    Actor->AttachToComponent(this, FAttachmentTransformRules::KeepWorldTransform);
    Mover->SetShouldMove(true);
}
else
{
   Mover->SetShouldMove(false);
}
Adding and Removing Tags
가고일 석상을 잡았을 때 가고일 석상에 Grabbed 태그 추가하기
① Grabber.cpp의 Grab함수에 잡은 Actor "Grabbed" 태그 추가
if(HasHit)
{
    UPrimitiveComponent* HitComponent = HitResult.GetComponent();
    HitComponent->WakeAllRigidBodies();
    //추가
    HitResult.GetActor()->Tags.Add("Grabbed");
    PhysicsHandle->GrabComponentAtLocationWithRotation(
        HitComponent,
        NAME_None,
        HitResult.ImpactPoint,
        GetComponentRotation()
    );
}
② Grabber.cpp의 Release함수에 잡은 Actor "Grabbed" 태그 삭제
if(PhysicsHandle->GetGrabbedComponent() != nullptr)
{
    AActor* GrabbedActor = PhysicsHandle->GetGrabbedComponent()->GetOwner();
    GrabbedActor->Tags.Remove("Grabbed");
    PhysicsHandle->ReleaseComponent();
}
Boolean Logical Operators
GetAcceptableActor함수 boolean 로직 수정하기
AActor* UTriggerComponent::GetAcceptableActor() const
{
    TArray<AActor*> Actors;
    GetOverlappingActors(Actors);

    for(AActor* Actor : Actors)
    {
    	bool HasAcceptableTag = Actor->ActorHasTag(AcceptableActorTag);
        bool IsGrabbed = Actor->ActorHasTag("Grabbed");

        if(HasAcceptableTag && !IsGrabbed)
        {
            return Actor;
        }
    }

    return nullptr;
}
→ 가고일 석상을 잡았을 때 Grabbed 태그가 활성화된다. 따라서 가고일 석상을 BP_SecretWall에 놓았을 때만 활성화되게 하려면, AcceptableActorTag(가고일 석상)이면서 Grabbed가 활성화되지 않았을 때 (!Grabbed) 모두를 만족하는 && Boolean Logic을 사용하여 if문을 완성한다.
- Grabber.cpp 내 Release함수 코드 Boolean Logic 수정하기
<기존>
void UGrabber::Release()
{
	UPhysicsHandleComponent* PhysicsHandle = GetPhysicsHandle();

	if(PhysicsHandle == nullptr)
	{
		return;
	}

	if(PhysicsHandle->GetGrabbedComponent() != nullptr)
	{
		PhysicsHandle->GetGrabbedComponent()->WakeAllRigidBodies();
		PhysicsHandle->ReleaseComponent();
	}
}
<변경>
void UGrabber::Release()
{
	UPhysicsHandleComponent* PhysicsHandle = GetPhysicsHandle();

	if(PhysicsHandle && PhysicsHandle->GetGrabbedComponent())
	{
		AActor* GrabbedActor = PhysicsHandle->GetGrabbedComponent()->GetOwner();
       	        GrabbedActor->Tags.Remove("Grabbed");
		PhysicsHandle->ReleaseComponent();
	}
}
→ &&연산자에서 좌측이 false인 경우엔 우측 피연산자를 아예 평가하지 않는다
- TickComponent도 동일하게 수정
Level Polish
Scene의 노출 보정 메서드 수정하기
- Actor에 +Add>Volumes>PostProcessVolume 추가
- Detail>Exposure>Metering Mode를 "Auto Exposure Histogram → Auto Exposure Basic"

- PostProcessVolume의 영역을 유저가 갈 수 있는 모든 영역으로 확장시키기

※ ctrl+P: 원하는 헤더파일 혹은 cpp파일 검색
※ 해당 게시글은 개인 학습의 목적으로, 아래 강의를 수강한 후 정리한 학습노트입니다.