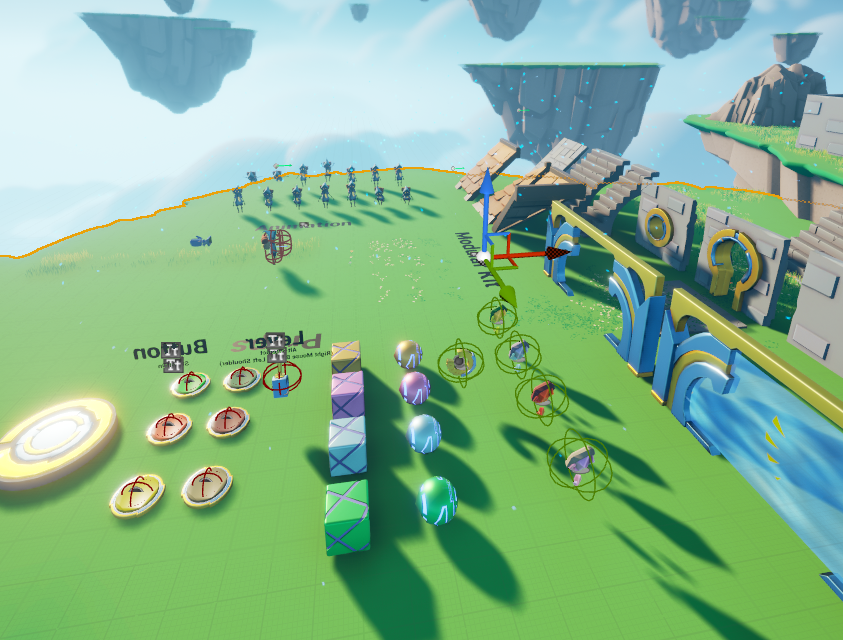
섹션3: 장애물 공격
: 언리얼 엔진5에서 장애물을 공격하는 프로젝트를 제작해보자
<<
[Project Plan]
- Create a project with our assets
- Install the tools we need for C++
- Learn some C++ basics
- Make a platform the moves
- Configure out moving platform
- Send the platform back
- Rotating platforms
프로젝트 셋업
① Market Place에서 아래 키트와 케릭터를 다운받는다.

② Create Project (UE 4.7 버전에서 구동가능하다)
프로젝트를 생성한 후, UE 버전을 5.0으로 바꿔준다.

그리고 실행하면....!
③ Save Current Level As 클릭 후 Content > Main으로 저장
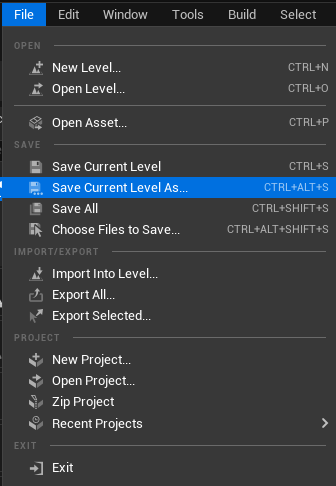
Settings> Project Settings 에서 Default로 저장
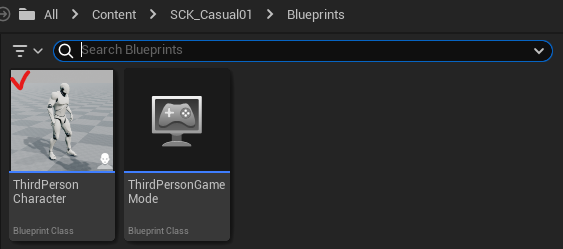
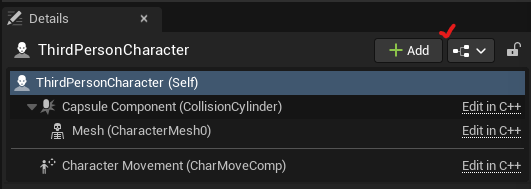
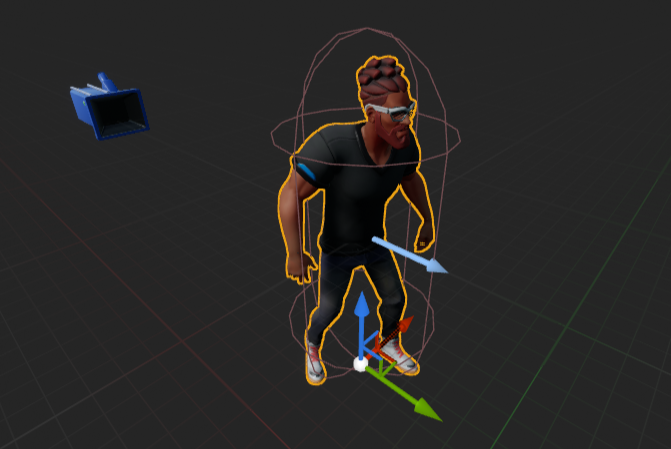
④ Content > SCK_Casual01 > Blueprints에 있는 ThirdPersonCharacter을 맵에 삽입
Customizing The Character
케릭터를 커스텀화해보자!
① 블루 프린트 > Create Child Blueprint Class
Name을 BP_ThirdPersonCharacter로 설정한 뒤 Content에 저장
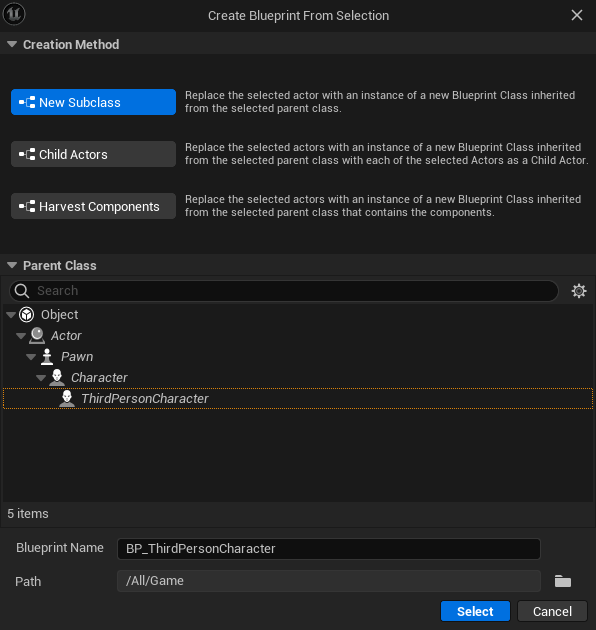
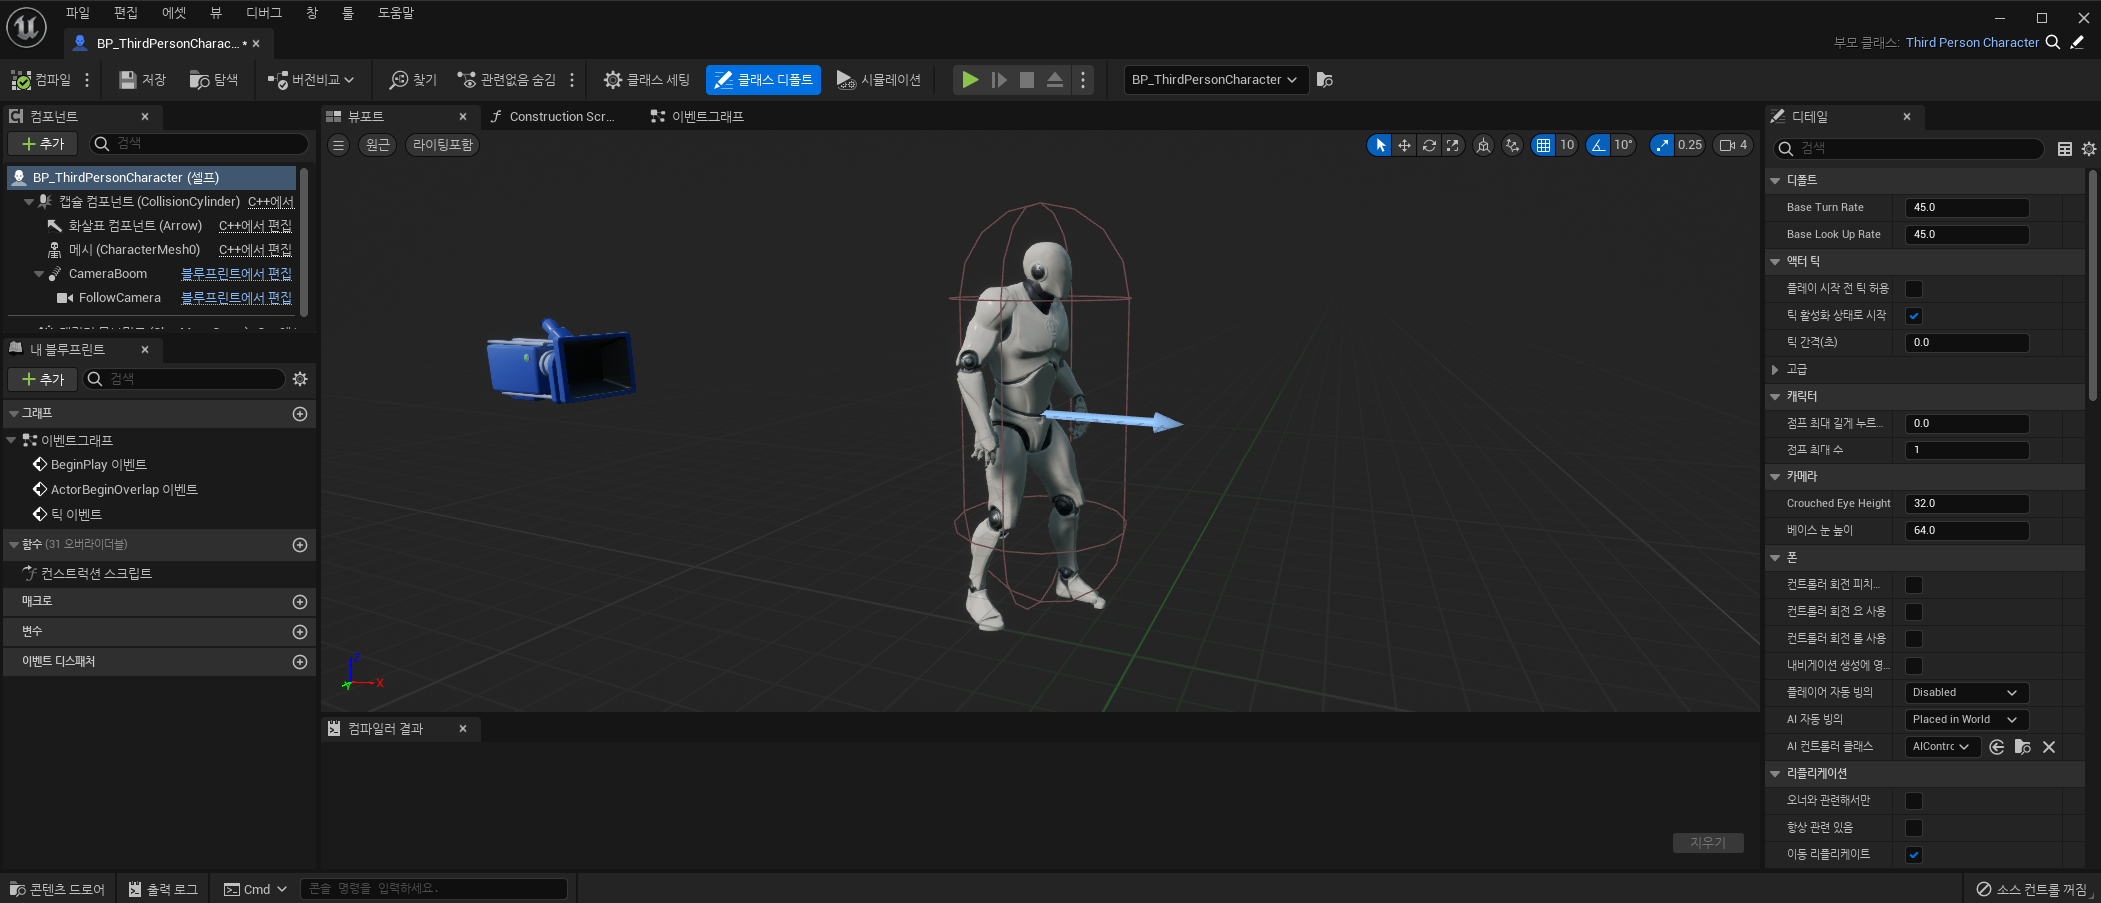
Select를 누르면 아래 화면이 생성된다
Details > auto 검색 > Auto Possess Player를 Player 0으로 설정
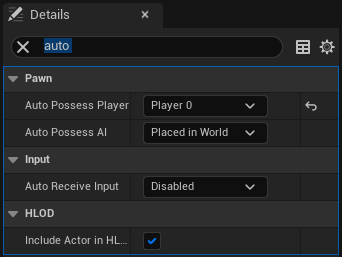
→ 이제 기본 플레이어가 위 마네킹으로 설정된다.
② 케릭터의 3인칭 카메라가 켜지지 않는 문제 해결하기
Content > Casual > 블루 프린트 > ThirdPersonCharacter 더블클릭
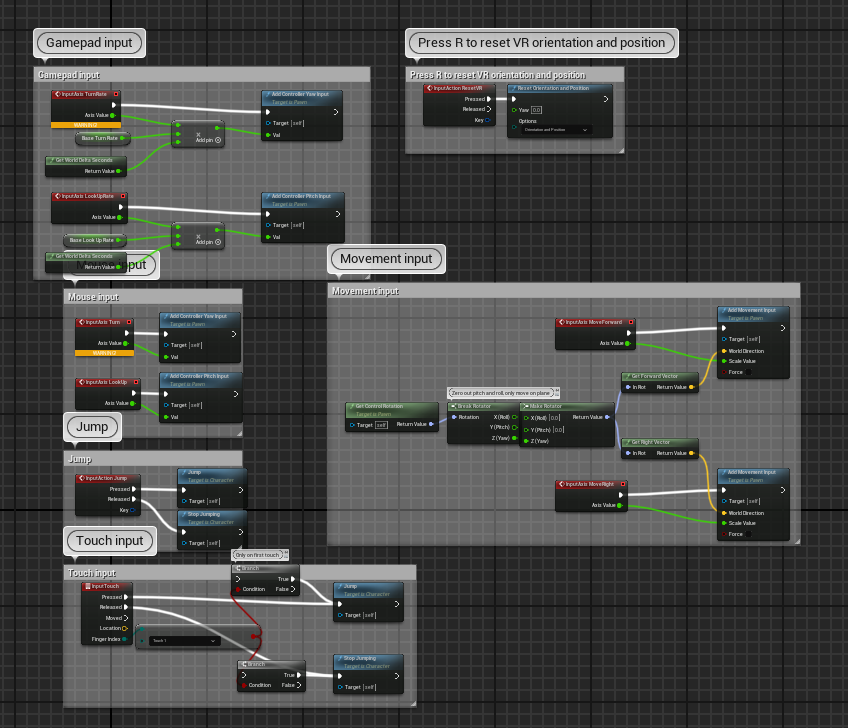
들어가보면, 컴파일 에러가 2개 생성되어 있다.

우클릭 후 TurnRightRate 가져오기
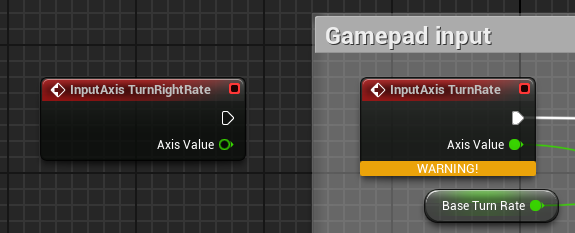
가져온 후 ctrl키를 눌러 기존 Exec 핀 위치를 변경해준다
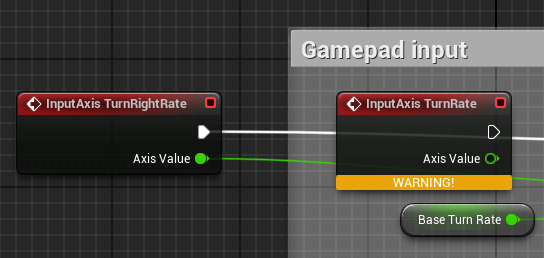
동일하게 아래 오류노드도 수정해준다
우클릭 후 TurnRight 노드 가져와서 수정
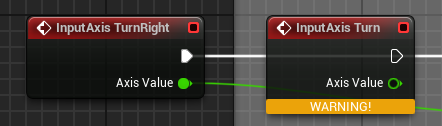
컴파일 후 저장
→ 이제 3인칭 카메라가 정상적으로 작동한다
③ 케릭터 커스텀화 하기
BP_ThirdPersonCharacter > Mesh (CharacterMesh0) 선택
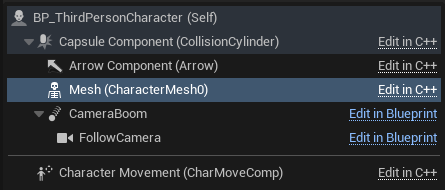
Details에서 Skeletal Mesh 변경하기
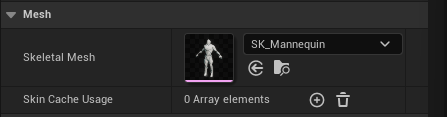
↓
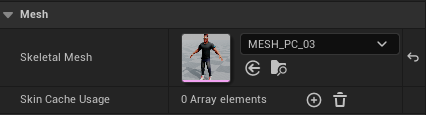
아래와 같이 변경된다
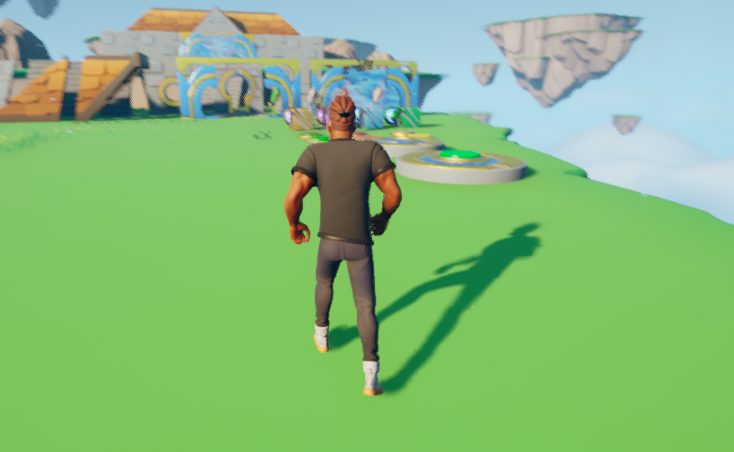
Main으로 돌아가 Play해보면 케릭터가 아래와 같이 변경된 것을 확인할 수 있다
Compiler & Editor

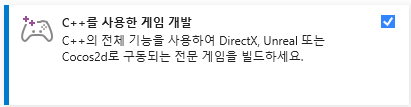
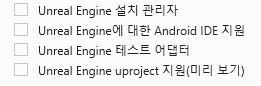
① Visual Studio
- C++를 사용한 게임 개발 설치
- Unreal Engine 설치 관리자 설치
- .NET 6.0 설치

※ https://dotnet.microsoft.com/ko-kr/download/dotnet?cid=getdotnetcore
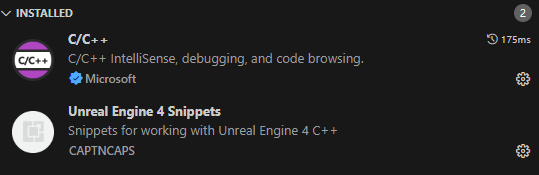
② Visual Studio Code
- Extensions > C/C++,Unreal Engine 4 Snippets 설치
Compiling a C++ Project
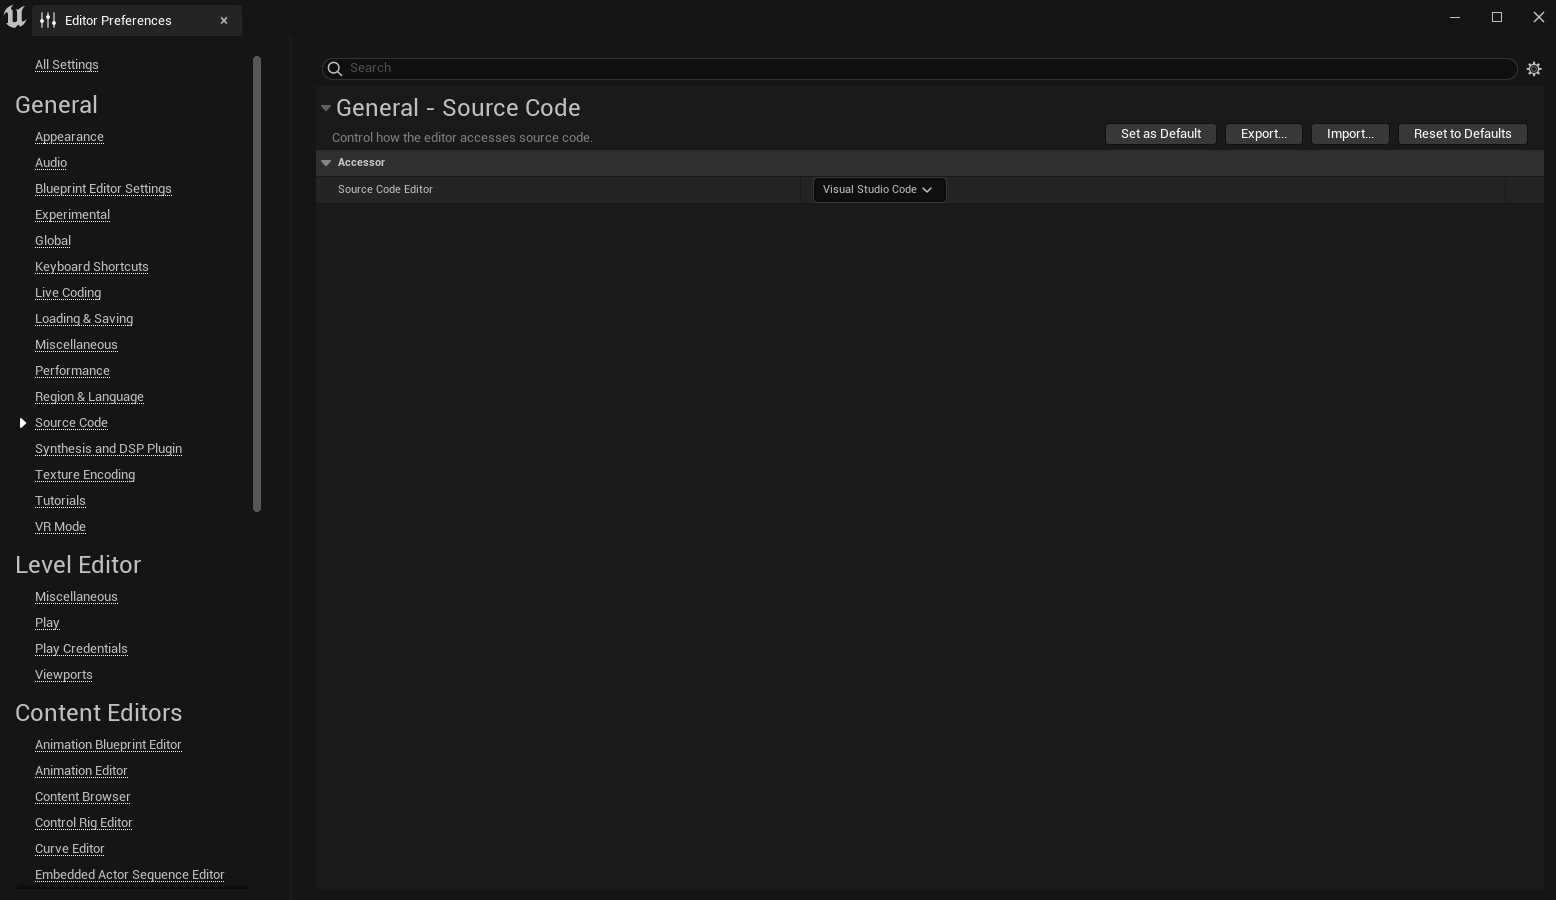
① Editor 바꾸기
- Edit > Editor Preferences
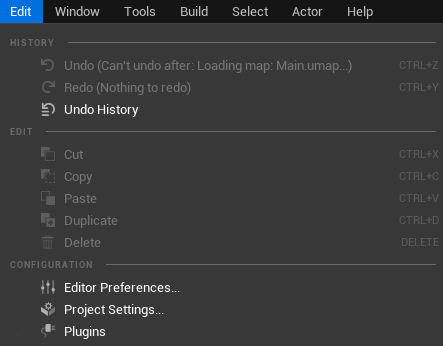
- Source Code > Editor를 Visual Studio Code로 변경
② C++ 클래스 생성하기
Tools > New C++ Class
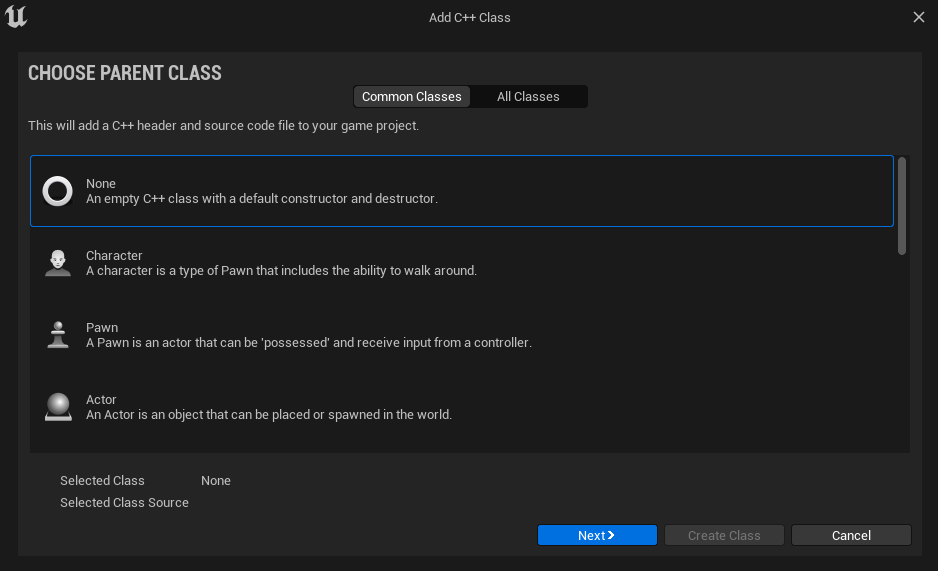
- Class 이름을 MovingPlatform으로 설정 (스페이스 X)

③ Visual Studio Code열기
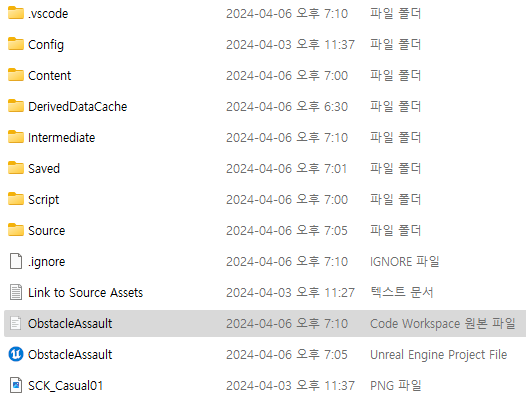
- Tools > Open Visual Studio Code
- 프로젝트 파일 경로 내 Code Workspace 파일 열기
③ Terminal > Run Build Task > ObstacleAssaultEditor Win64 Development Build
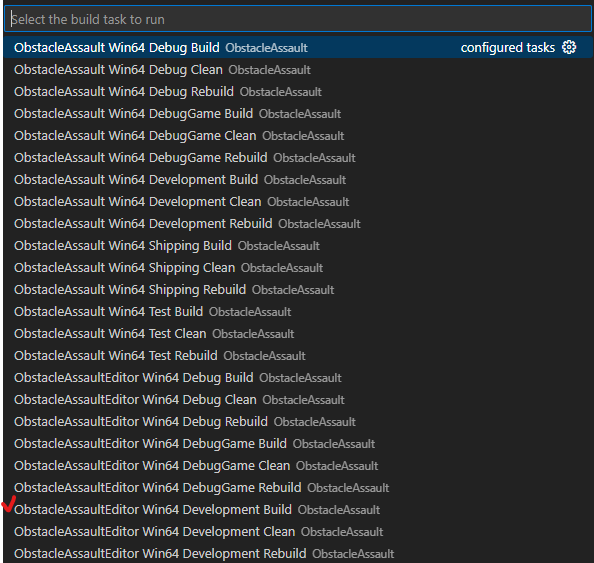
아래 메시지가 뜨면 완료된 것이다.

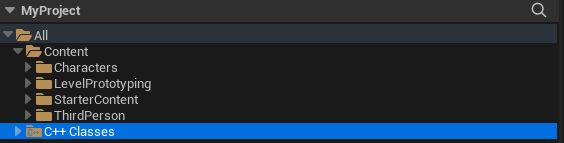
강의에 사용된 UE5 패키지 버전들이 서로 호환이 안된다...그래서 그냥 5.3에서 했다
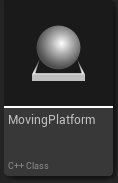
그리고 프로젝트를 다시 실행하면, 아래 C++ Classes 내에 생성된 MovingPlatform을 확인할 수 있다.
UPROPERTY Variables
① 블루프린트에서 보이려면, 표시해야할 변수가 있다는 것을 알려줘야 한다
- MovingPlatform.h의 public 맨 하단에 아래 코드를 추가한다.
UPROPERTY(EditAnywhere)
int32 MyInt = 99;
② 라이브 코딩
언리얼 엔진 에디터를 끄지 않고도 코딩할 수 있게 한다

③ 컴파일이 완료되면, MovingPlatform의 Details에 아래와 같이 변수가 추가된 것을 확인할 수 있다.


- 아래와 같이, float형,bool형 변수도 추가한 후 다시 컴파일 해보자.
UPROPERTY(EditAnywhere)
float MyFloat = 5.99;

UPROPERTY(EditAnywhere)
bool MyBool = true;
Live Coding Issues
라이브 코딩은 Editor의 변경 사항에만 영향을 미치고 디스크에 영구적으로 저장하지는 않는다.
→ 변수의 값을 Editor에서 변경해도, 변경된 값이 Editor의 Actor에 저장되지는 않는다. 데이터가 사라진 채로 저장될 수도 있다.
해결방법
① Editor를 닫은 후, VSCode에서 Ctrl+Shift+B로 재빌드한다.
→ 에디터를 닫은 채로, 에디터 밖에서 전체를 다시 컴파일해야 한다
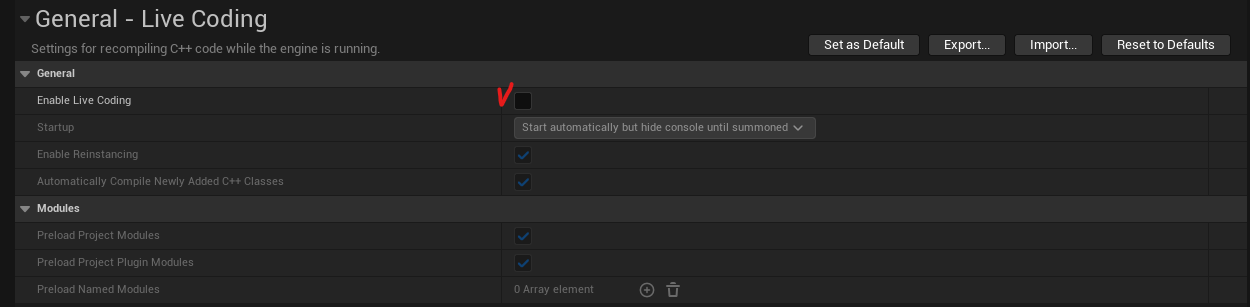
② Edit > Editor Preferences > Live Coding > Enable Live Coding 비활성화하기
C++ Files & BeginPlay
※ Editor에서 실행할 함수는 cpp에 입력한다.
MovingPlatform.cpp > BeginPlay 함수에서 MovingPlatform.h에서 정의한 변수에 엑세스해보자
① BeginPlay 아래에 다음 코드를 추가한다
void AMovingPlatform::BeginPlay()
{
	Super::BeginPlay();

	MyInt = 9;
}
② 그리고 게임에서 Play하면, 기본값이 99로 설정되어 있던 MyInt값이 9로 변경된다.

③ 간단한 계산기 만들기
- MovingPlatform.h에 int형 변수 InputA,B,APlusB 추가
UPROPERTY(EditAnywhere)
int32 InputA = 0;

UPROPERTY(EditAnywhere)
int32 InputB = 0;

UPROPERTY(EditAnywhere)
int32 APlusB = 0;
- MovingPlatform.cpp의 BeginPlay 아래에 다음 코드 추가
APlusB = InputA + InputB;
- Compile 후 BeginPlay하기 전에, Details에 InputA,B 값 입력
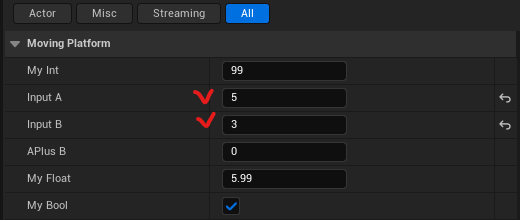
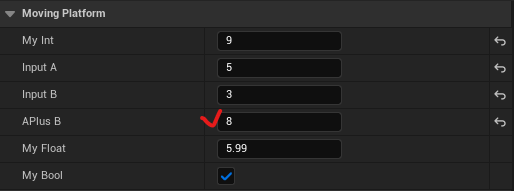
- BeginPlay
: BeginPlay 실행 후, InputA와 InputB의 연산이 실행되어 아래처럼 두 값의 합산값이 계산된다
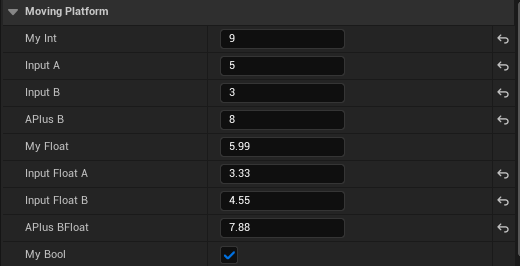
+ 같은 방법으로 Float형도 추가하기
Using Structs In C++
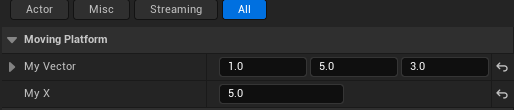
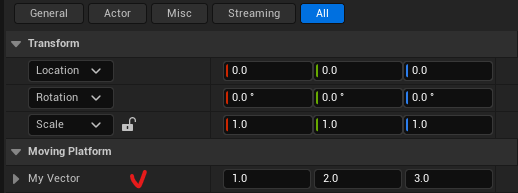
① Vector 변수 선언하기
UPROPERTY(EditAnywhere)
FVector MyVector = FVector(1,2,3);
※ 구조체형 변수 앞에는 F를 붙인다

② float형 변수MyX 선언 후, cpp에서 BeginPlay 뒤에 MyVector의 X값을 할당
- MovingPlatform.h
UPROPERTY(EditAnywhere)
float MyX = 0;
- MovingPlatform.cpp
Super::BeginPlay();
MyX = MyVector.X;
③ MyVecotr의 Y값을 MyX로 선언
MyVector.Y = MyX;
- Editor에서 MyX 값을 5로 변경

- Play버튼을 누르면 아래와 같이 Y의 값이 MyX값으로 변경된다
Calling Functions in C++
C++에서 함수를 호출해보자
① SetActorLocation 함수 호출 후, FVector 인자 삽입
SetActorLocation(FVector(1,2,3));
② MovingPlatform에 위치 추가하기
컴포넌트만 위치를 지정할 수 있으므로, MovingPlatform Actor에 큐브를 추가한다.

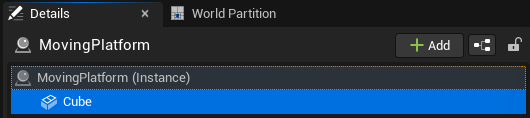
그리고 MovingPlatform을 더블클릭하면, MovingPlatform의 위치로 이동할 수 있다.
그리고 아래 Detach 버튼을 눌러,

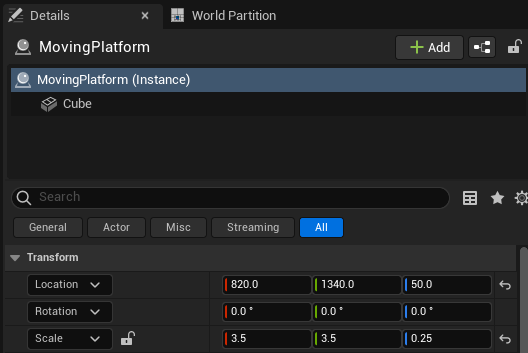
MovingPlatform의 위치를 확인해보면, 1,2,3으로 되어 있는 것을 알 수 있다.
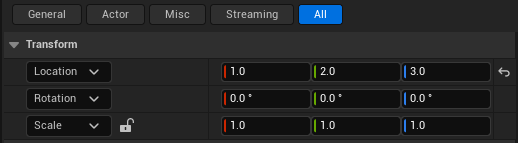
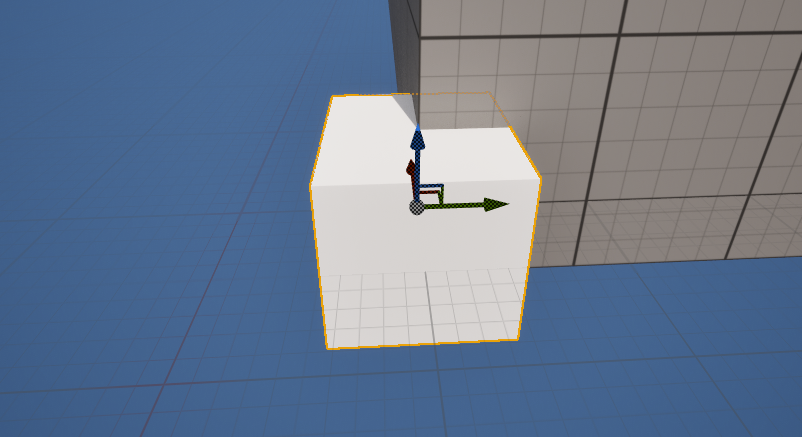
③ ThirdPerson의 위치를 우클릭하여 복사한 후, MovingPlatform의 위치를 해당 위치로 옮긴다
- MovingPlatform.cpp에서 BeginPlay이후 Location을 MyVector로 설정
SetActorLocation(MyVector);
- ThirdPerson의 위치 복사
- MovingPlatform의 MyVector에 붙여넣기
- Play버튼을 누르면 아래처럼 Cube의 위치가 옮겨진다
TICK
Game Loop란?
1. Process Input
2. Update game state
3. Render to display
→ Frame이라고 부른다 (동영상을 구성하는 하나의 그림)
※ Frame rate: 컴퓨터가 1초당 계산할 수 있는 프레임 수를 말한다
→ 언리얼에서는 Tick함수를 사용해 게임 루프의 중간 단계를 진행한다
① Tick 아래에 아래 코드 추가 (MyVector의 Z값 +1)
void AMovingPlatform::Tick(float DeltaTime)
{
	Super::Tick(DeltaTime);

	MyVector.Z=MyVector.Z + 1;

	SetActorLocation(MyVector);
}
② Compile 후 Play
③ Y값 +1 증가로 코드 변경
MyVector.Y = MyVector.Y + 1;
SetActorLocation(MyVector);
④ Compile 후 Play하면 아래처럼 Y축 방향으로 계속 움직인다
Local Variables
Scope?
변수가 유지되는 기간을 의미한다
① MovingPlatform.cpp에 지역변수 LocalVector 추가 후,초기값을 MyVector로 초기화하고 Z값을 +100
FVector LocalVector = MyVector;
LocalVector.Z = LocalVector.Z + 100;

MyVector.Y = MyVector.Y + 1;
SetActorLocation(LocalVector);
→ LocalVector의 Z값을 +100하고, MyVector의 Y값도 +1씩 변경한다
하지만, Cube의 Z값이 +100씩 바뀌지는 않는다.

② Editor에서 Play버튼 후 빠져나와서 Moving Platform의 Location 확인하기
- 초기 Location
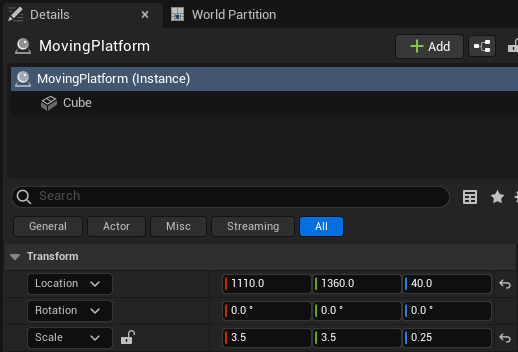
- Play버튼 후 MovingPlatform의 Location
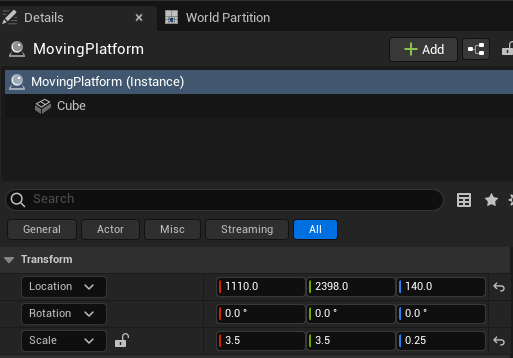
→ 지역변수는 함수가 특정한 실행을 마쳤을 때, 사라지고 초기화된다
(클래스 변수는 다른 함수로 인해 언제든 업데이트 될 수 있다)
- MovingPlatform.h에서 Tick이 실행될때마다 MyVector는 업데이트 되기 때문임
class MYPROJECT_API AMovingPlatform : public AActor
{
	GENERATED_BODY()

public:
	// Sets default values for this actor's properties
	AMovingPlatform();

protected:
	// Called when the game starts or when spawned
	virtual void BeginPlay() override;

public:
	// Called every frame
	virtual void Tick(float DeltaTime) override;

	UPROPERTY(EditAnywhere)
	FVector MyVector = FVector(1,2,3);

};
Pseudo Code
Pseudo Code?
알고리즘에서 사용할 단계를 일반적인 언어로 설명한 것이다
Comment(주석)
컴파일러에서 무시하는 코드를 말한다. 주석을 사용하여 pseudo code를 작성할 수 있다.
VSCode에 아래와 같이 주석을 달아본다.
// Move platform forwards
    // Get current location
    // Add vector to that location
    // Set the location
// Send platform back if gone too far
    // Cheeck how far we've moved
    // Reverse direction of motion if gone too far
Function Return Values
Expression
Fragment of code that produces a value
ex) MyVector, LocalVector.Z+100, GetActorLocation()
Statement
An action to be performed
① GetActorLocation, SetActorLocation으로 기존 코드 대체하기
- 기존코드
FVector LocalVector = MyVector;
LocalVector.Z = LocalVector.Z + 100;
MyVector.Y = MyVector.Y + 1;
SetActorLocation(LocalVector);
- 대체코드
FVector CurrentLocation = GetActorLocation();
SetActorLocation(CurrentLocation);
② MovingPlatform의 위치 설정 후 Play 버튼
③ MovingPlatform이 X+1씩 이동하는 것을 볼 수 있다
Velocity & Deltatime
속도 항목을 추가해서 전체 벡터를 한번에 지정해보자
① MovingPlatform.h에 새로운 카테고리 Moving Platform 및 FVector 추가
UPROPERTY(EditAnywhere, Category="Moving Platform")
FVector PlatformVelocity = FVector(100, 0, 0);
② MovingPlatform.cpp에 CurrentLocation에 PlatformVelocity 추가
//CurrentLocation.X = CurrentLocation.X + 1; (기존 코드)
CurrentLocation = CurrentLocation + PlatformVelocity;
③ MovingPlatform Actor 내 카테고리인 Moving Platform에 FVector가 추가된다

④ DeltaTime을 활용하여, PlatformVelocity 실행간격 조절하기
CurrentLocation = CurrentLocation + PlatformVelocity * DeltaTime;→ 1s에 100cm(FVector 설정값)씩 움직이게 된다
※ DeltaTime: 언리얼에서 각 프레임이 어느 정도의 간격으로 실행될지 결정하는 시간 변수
Scope Resoultion Operator
(범위 지정 연산자)
① MovingPlatform.h에 StartLocation 설정 후, cpp에서 GetActorLocation으로 위치 가져오기
- MovingPlatform.h
FVector StartLocation; //C++에서만 사용하므로, UPROPERTY는 하지 않음
- MovingPlatform.cpp
void AMovingPlatform::BeginPlay()
{
	Super::BeginPlay();
	StartLocation = GetActorLocation();
}
② cpp에서 FVector 내 Dist 함수를 활용하여, StartLocation과 CurrentLocation 사이의 거리 출력
- MovingPlatform.h에 DistanceMoved float형 변수 선언
UPROPERTY(VisibleAnywhere)
float DistanceMoved = -1;
- MovingPlatform.cpp에 거리를 DistanceMoved에 할당
// Send platform back if gone too far
    // Cheeck how far we've moved
DistanceMoved = FVector::Dist(StartLocation, CurrentLocation); //순서 안 중요함
③ Play 버튼을 눌러 Distance 확인하기
- 기본값: -1.0

- Play 버튼 클릭

If Statements
If문을 활용하여 일정 거리만큼 이동했을 때, 이동방향을 반대로 바꿔보자
① MovingPlatform.h에 float형 변수 MoveDistance를 100으로 초기화
UPROPERTY(EditAnywhere, Category="Moving Platform")
float MoveDistance = 100;
② MovingPlatform.cpp에 DistanceMoved를 지역변수로 변경 후, if문 작성
    // Set the location
SetActorLocation(CurrentLocation);
// Send platform back if gone too far
    // Cheeck how far we've moved
float DistanceMoved = FVector::Dist(StartLocation, CurrentLocation);
    // Reverse direction of motion if gone too far
if(DistanceMoved > MoveDistance)
{
    PlatformVelocity = -PlatformVelocity;
    StartLocation = CurrentLocation;//시작점을 현재위치로 초기화
}
③ Play 버튼을 누른 후, 100만큼 이동하면 MovingPlatform의 이동방향이 반대가 된다
Using Member Functions
Actor가 MoveDistance만큼 이동했을 때,
끝 점을 지나치지 않고 정확히 끝 점에서 끝나도록 설정하기
PlatformVector의 법선벡터를 가져온 후, 총 이동할 거리만큼 StartLocation을 변경하기
FVector MoveDirection = PlatformVelocity.GetSafeNormal();
StartLocation = StartLocation + MoveDirection * MoveDistance;
SetActorLocation(StartLocation);
Blueprint Child Classes
블루프린트의 Child 클래스 만들기
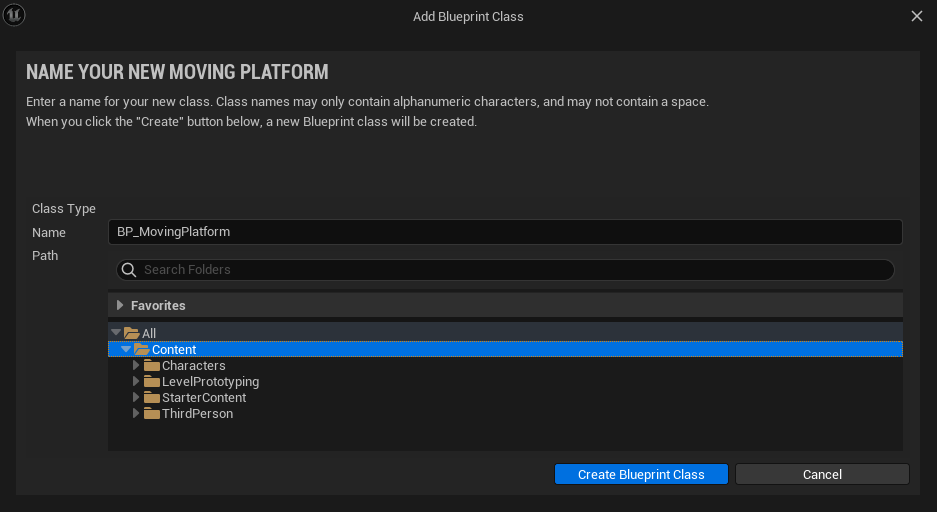
① C++ 클래스에서 MovingPlatform 우클릭 후 블루프린트 Class 생성하기
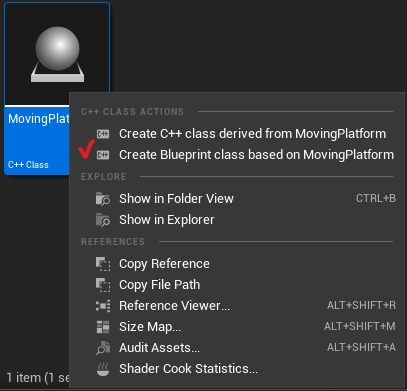
앞에 BP_를 붙여 Content에 생성
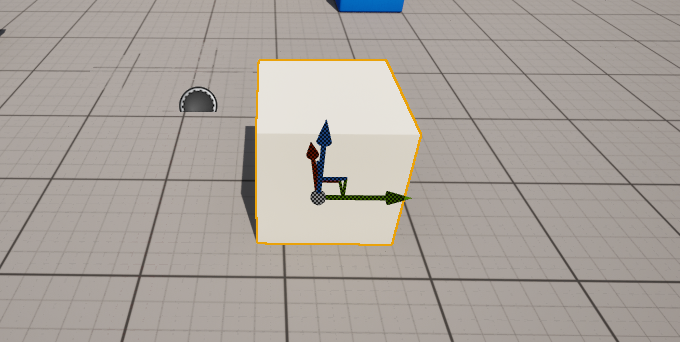
② Content Drawer에서 필터 > Static Mesh 삽입하기
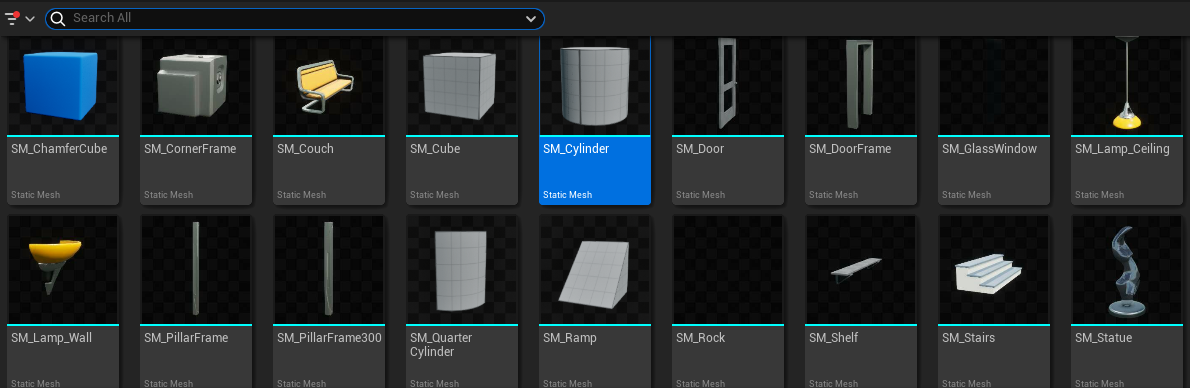
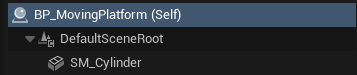
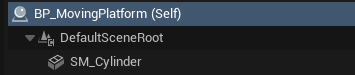
삽입하면 아래처럼 DefaultSceneRoot 아래에 추가된다.
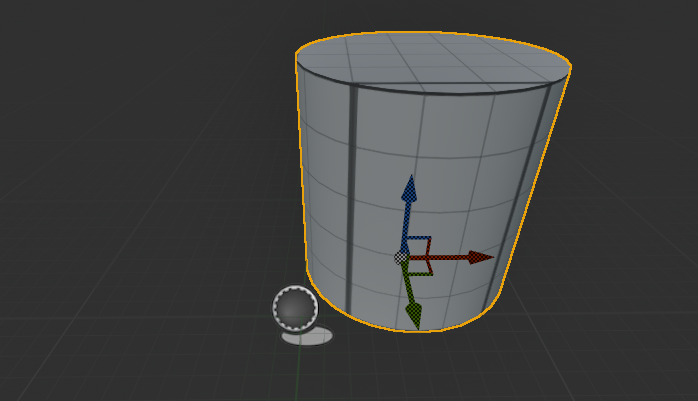
그리고 StaticMesh를 원점에서 살짝 벗어나도록 이동시킨다
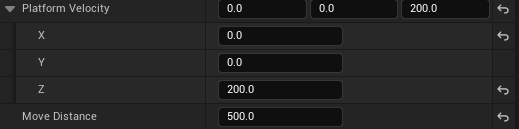
그리고 BP_MovingPlatform을 선택한 후,
PlatformVelocity = (0,0,200)으로 설정, MoveDistance = 500으로 설정한다
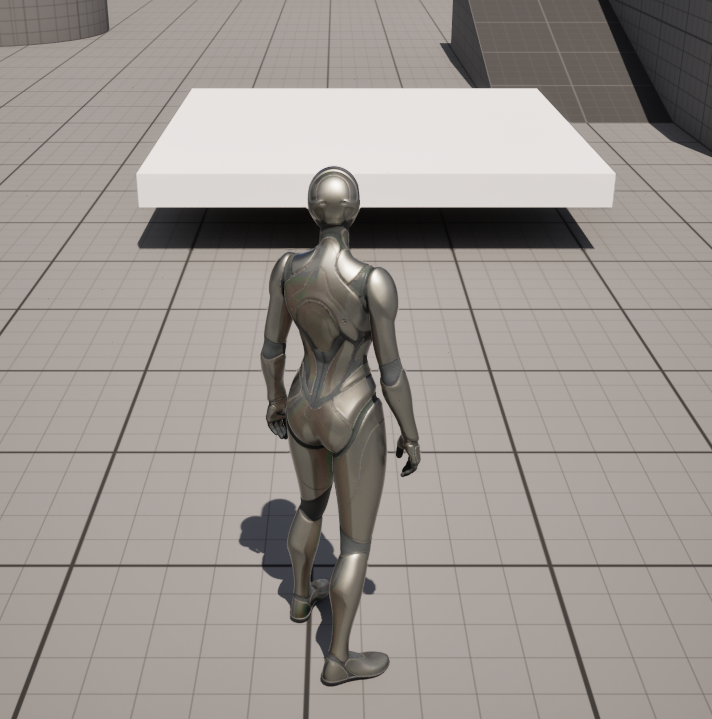
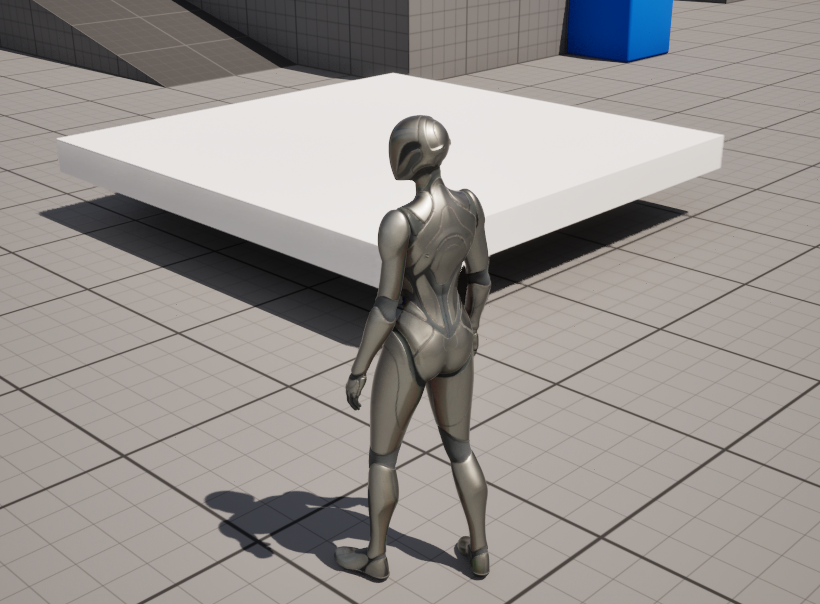
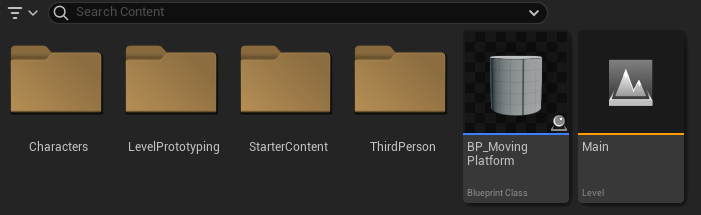
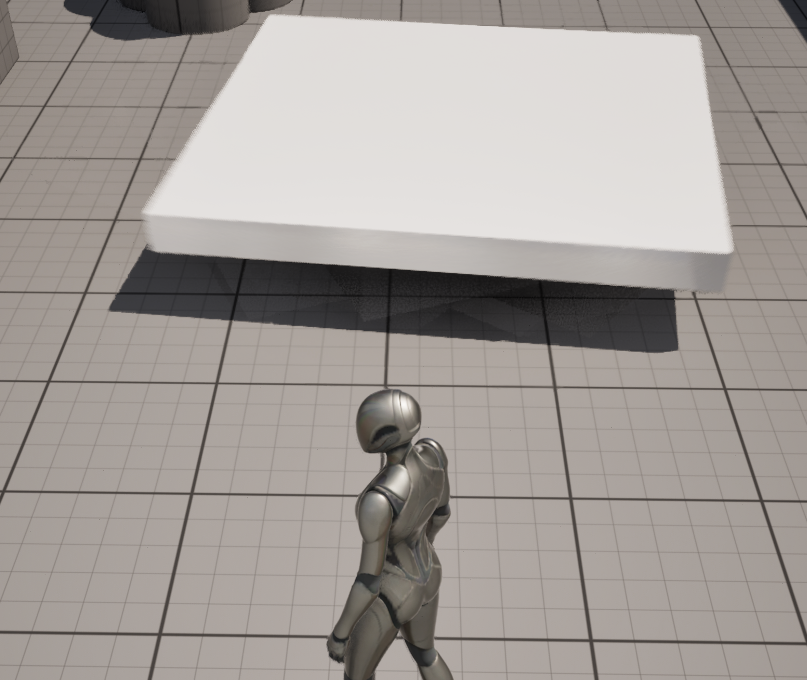
③ ContenDrawer로 돌아가, 방금 생성한 BP_MovingPlatform을 삽입한다
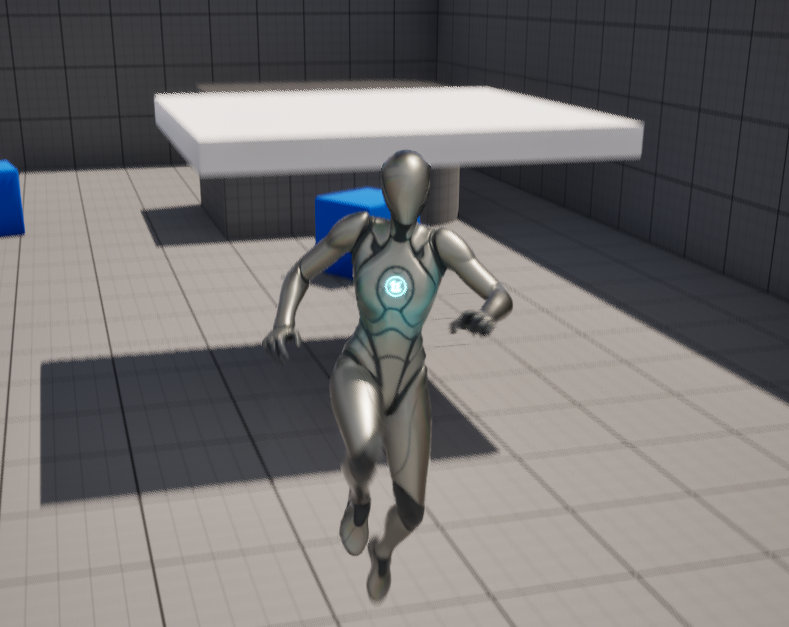
④ Play버튼을 누르면, 방금 삽입한 클래스가 위,아래로 움직인다
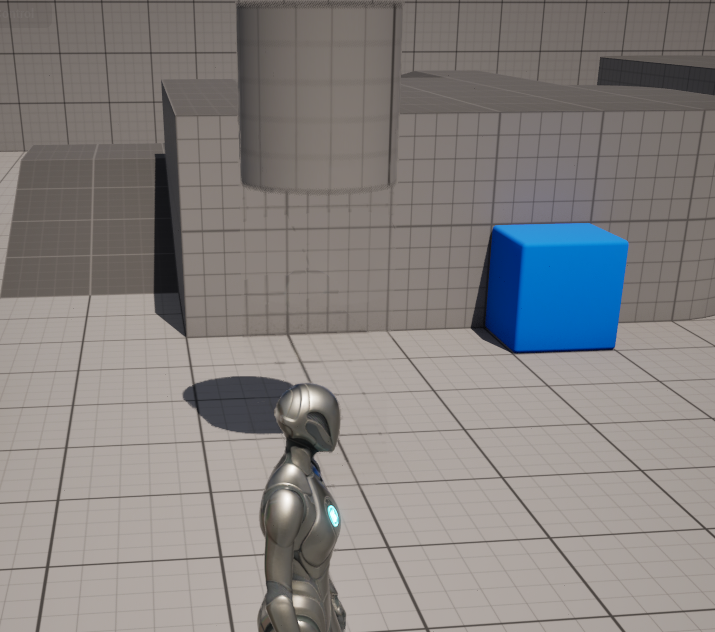
⑤ 블루프린트에서 Object를 XY평면 아래로 배치한다
※ Object 선택 후 우클릭하면, 선택한 객체로 View를 설정할 수 있다
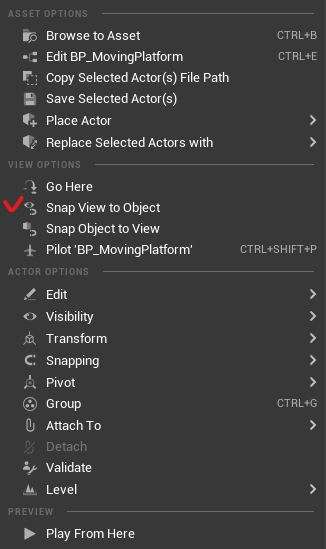
위와 같이 설정하면, 돌기둥이 바닥을 뚫고 내려갔다가 올라온다
Forcing Character Collisions
케릭터가 장애물과 충돌하도록 만들기
① MovingPlatform에서 새로운 Child 클래스 생성하기
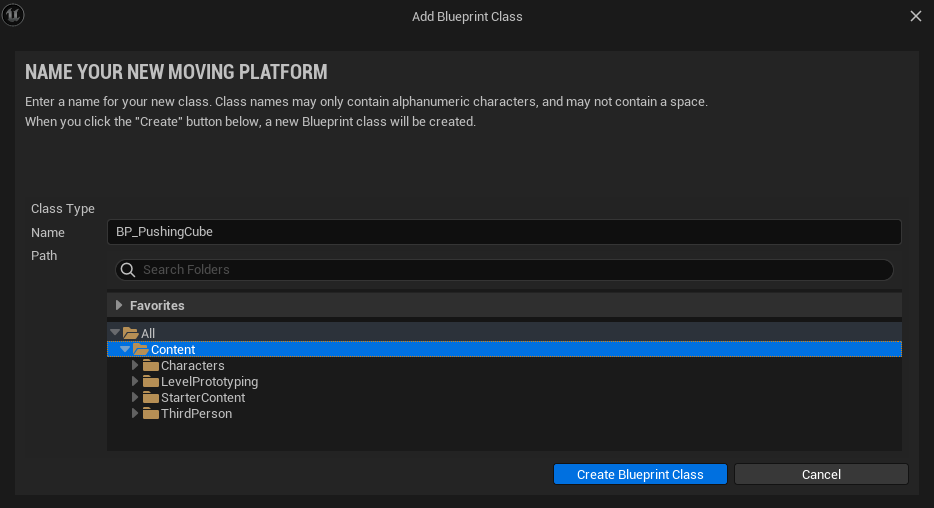
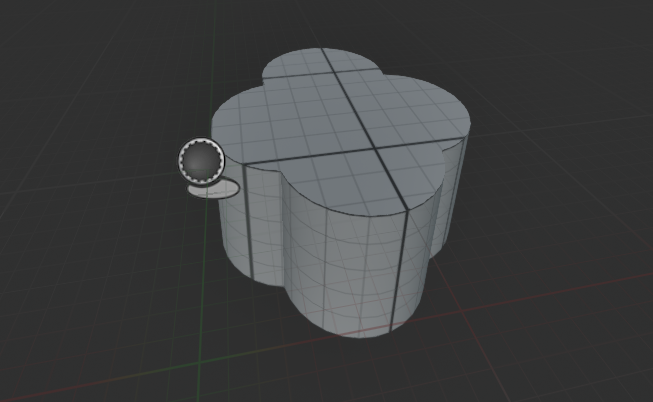
Box형태의 StaticMesh 삽입
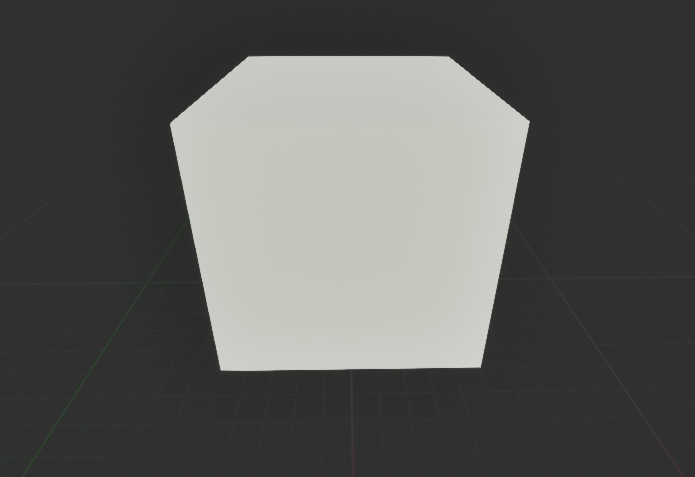
자물쇠 표시를 누른 후 스케일 100배 하기
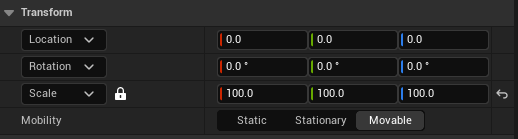
BP_PushingCube를 선택한 후, Velocity와 MoveDistance 설정

Content Drawer에서 해당 박스를 삽입하기
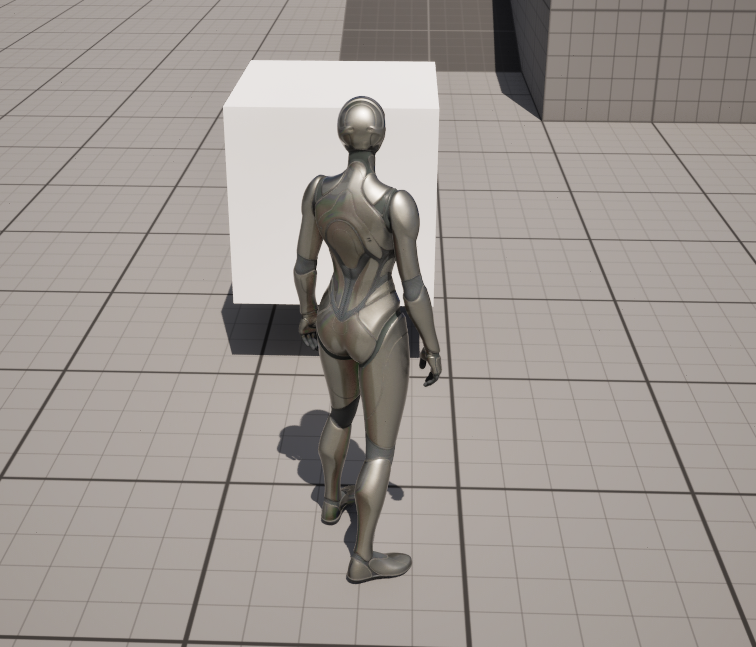
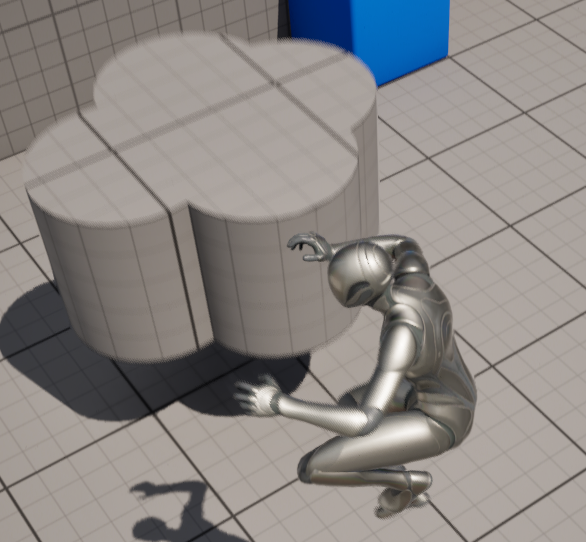
② Play버튼을 눌러 케릭터와 충돌시켜본다
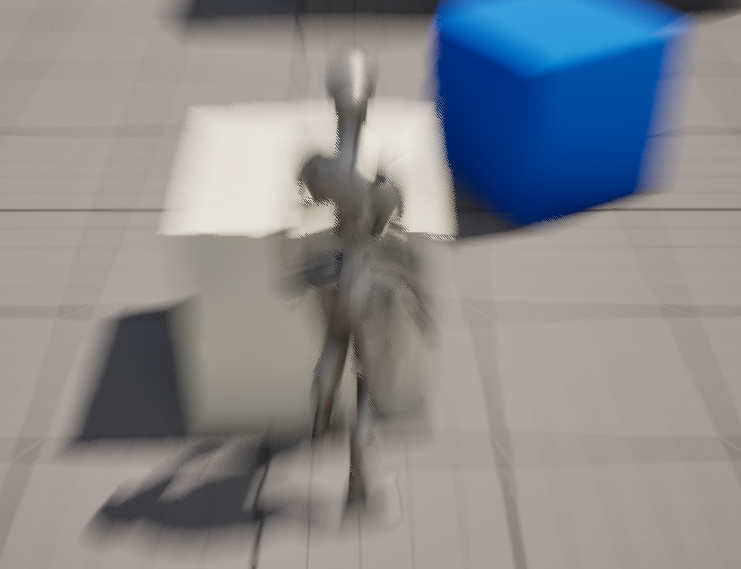
→ 케릭터의 기본 코드는, 케릭터가 움직이기 전에는 object와 충돌하지 않는다
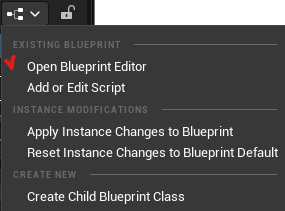
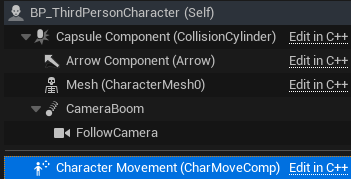
③ BP_ThirdPersonCharcter를 선택한 후, 블루프린트 버튼에서 Open Blueprint Editor
Character Movement를 선택한 후,
블루프린트 이벤트 그래프 우클릭 후 MoveUpdatedComponent 추가
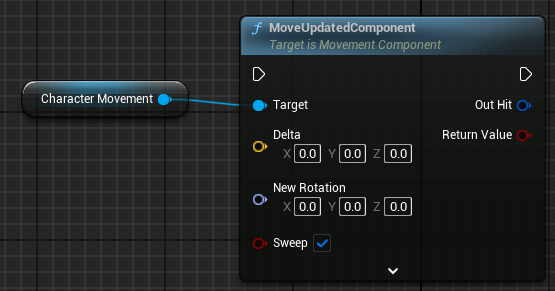
- Delta: 얼마나 멀리 이동할지 결정
- Sweep: 이동하는 중에 발생하는 충돌을 탐지
④ EventTick을 추가하여 연결
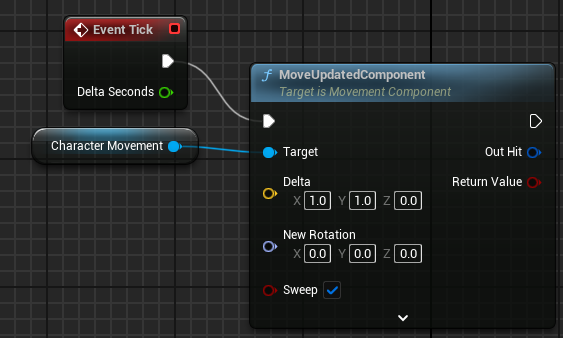
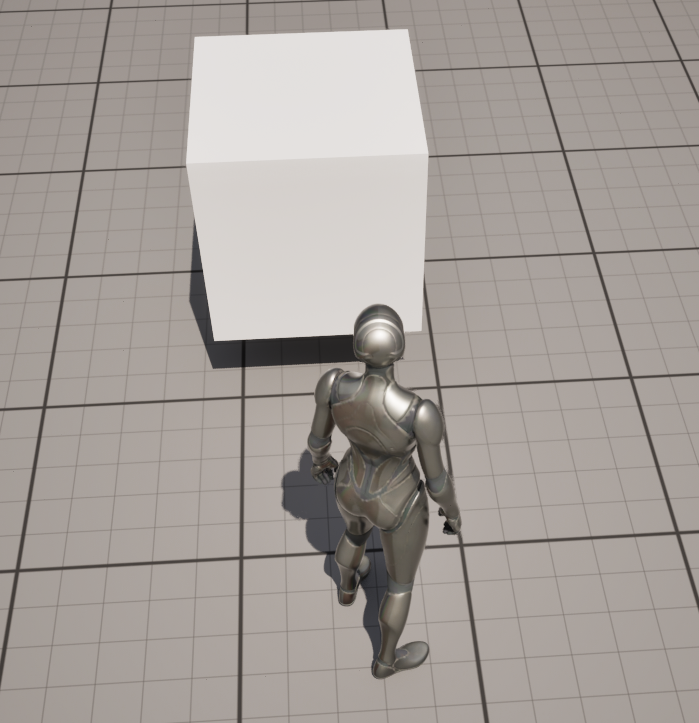
→ 지금처럼 연결할 경우, Tick 함수 발생 시마다 자동으로 케릭터가 X,Y 1씩 이동한다
따라서, 새로운 MoveUpdatedComponent를 추가하여 반대방향으로 Delta를 설정해준다.

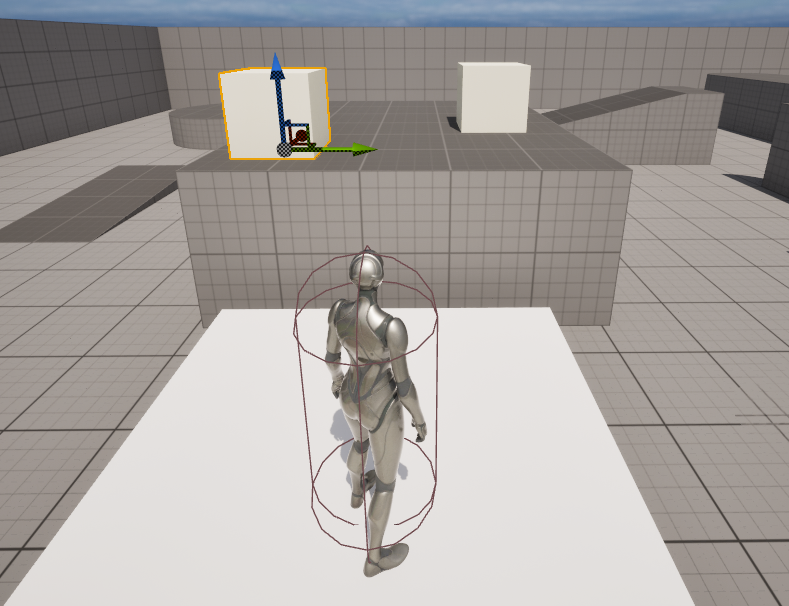
→ 지금처럼 설정하면, 이제 케릭터가 Object와 충돌할 때 자연스럽게 움직이게 된다
지금까지 만든 클래스들로 아래와 같이 만들어본다
⑤ Get Actor Rotation를 추가하여 연결한다
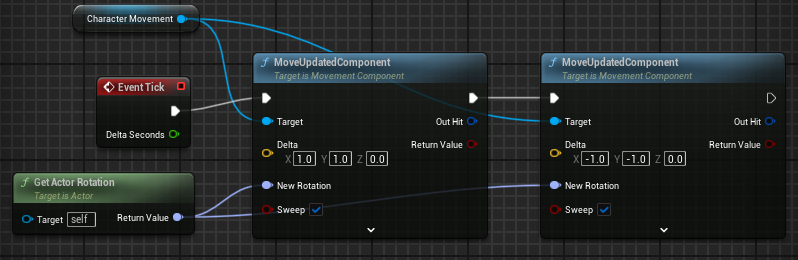
→ 이제 Actor를 회전시킬 수 있게 됐다
GameMode
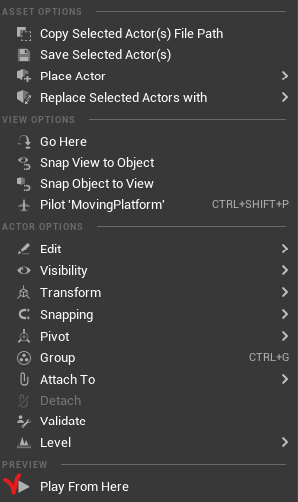
Object 선택 후 우클릭하여, Play From Here에서 Play를 시작할 수 있다
GameMode란?
→ 레벨에 들어가서 게임 규칙을 관리하는 액터
(누가 어디에 스폰해야 하는지, 플레이어가 어떤 클래스를 사용할 지 등의 게임 작동방식 정의)
① 블루프린트 버튼 클릭
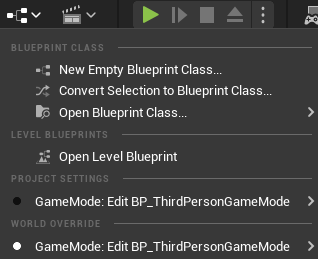
- Project Settings: 프로젝트 전체에 대한 설정으로, 프로젝트에서 생성한 모든 레벨에 대한 기본 게임 모드
- World Override: 특정레벨에 대한 게임 모드
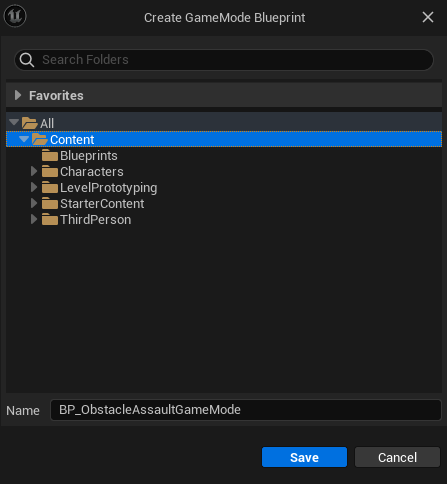
② Project Settings > Create > GameModeBase 선택
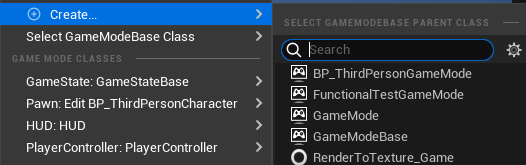
③ BP_ObstacleAssaultGameMode 라고 명명 후 Save
새로운 창이 실행된 후, Class Defaults를 선택

- Details 내 Classes 섹션 > Default Pawn Class를 변경

④ World Override > Select GameModeBase Class > None 선택
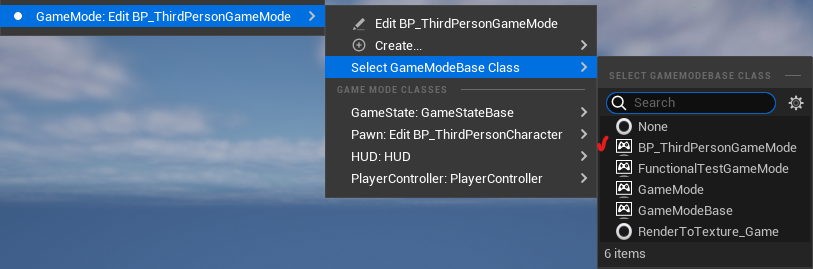
이제 Project Settings로 변경된 것을 알 수 있다.

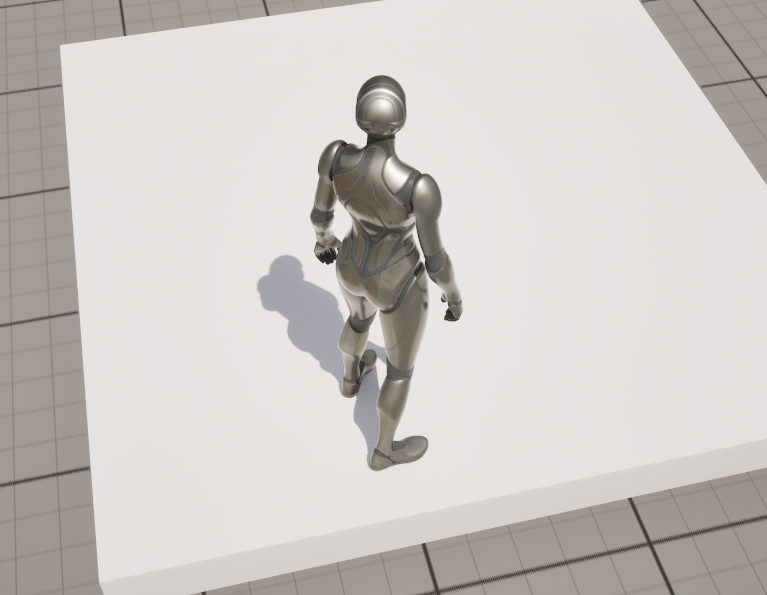
⑤ Player Start를 삽입한 후, Play 버튼 혹은 Object 선택 후 우클릭하여 Play from here
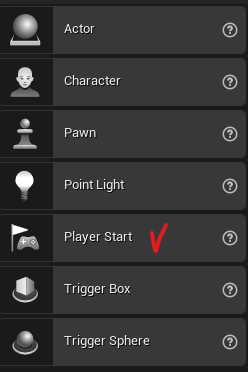
- 이제 정상적으로 작동한다!
Writing To The Output Log
사용자 로그에서 원하는 문구를 출력하기
① Unreal Engine 4 Snippets를 설치하면, 문구를 자동으로 완성해준다.

② UE_LOG 구문 작성하기 (ulog)
UE_LOG(LogTemp,Display, TEXT("Your message"));
- LogTemp: 로그 카테고리 유형
- Display: 로그의 긴급 수준
- TEXT: 출력할 텍스트
③ Play버튼을 누른 후, Output Log 확인

: ` 버튼을 2번 눌러서 실행할 수도 있다
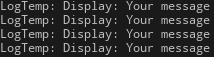
→ MovingPlatform의 씬에 있는 모든 Actor에 대해 메시지를 출력하기 때문에 여러 번 출력됨
④ Display, Warning, Error 메세지 출력해보기
UE_LOG(LogTemp, Display, TEXT("Your message"));
UE_LOG(LogTemp, Warning, TEXT("Your message"));
UE_LOG(LogTemp, Error, TEXT("Your message"));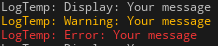
⑤ MoveDistance 변수 출력하기
UE_LOG(LogTemp, Display, TEXT("Congifured Moved Distance: %f"), MoveDistance);

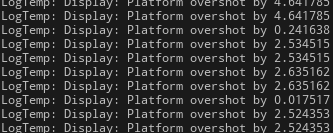
⑥ if문에 Overshoot 변수 추가 후 출력하기
if(DistanceMoved > MoveDistance)
{
    float OverShoot = DistanceMoved - MoveDistance;
    UE_LOG(LogTemp, Display, TEXT("Platform overshot by %f"), OverShoot);

    PlatformVelocity = -PlatformVelocity;
    FVector MoveDirection = PlatformVelocity.GetSafeNormal();
    StartLocation = StartLocation + MoveDirection * MoveDistance;
    SetActorLocation(StartLocation);
}
FString
여러 개의 문자, 즉 문자열 출력하기
① FString 변수로 문자열을 초기화한 후, UE_LOG에 추가하기
FString MyString = "My String Value";
UE_LOG(LogTemp, Display, TEXT("Here's My String: %s"), *MyString);
※ 언리얼에서는 FString 문자열을 출력할 때, 변수형 앞에 *를 사용해야 한다
(언리얼 내부에서 MyString을 바로 인식하지는 못하기 때문)

② Dynamic Value 출력하기
FString Name = GetName();
UE_LOG(LogTemp, Display, TEXT("BeginPlay: %s"), *Name);

→ 나중에 오버슛이 발생했을 때, 로그 메시지에 Actor의 이름을 출력하면 문제를 찾기 더 쉬워진다
③ If문에 GetName()을 추가하여 Actor 출력하기
FString Name = GetName();
UE_LOG(LogTemp, Display, TEXT("%s Platform overshot by %f"), *Name, OverShoot);

Member Functions
멤버 함수를 사용하여, 지금까지 작성한 코드를 함수로 정리해보자
① MovingPlatform.h에 private으로 멤버함수 MovePlatform의 원형 제공하기
private:

	UPROPERTY(EditAnywhere, Category="Moving Platform")
	FVector PlatformVelocity = FVector(100, 0, 0);

	UPROPERTY(EditAnywhere, Category="Moving Platform")
	float MoveDistance = 100;

	FVector StartLocation;

	void MovePlatform(float DeltaTime);
→ DeltaTime은 Tick함수에서 받아오는 값이므로, 새로운 변수를 지정하여 해당 값을 받아와야 한다
② MovingPlatform.cpp에서 MovePlatform 함수 정의하기
void AMovingPlatform::Tick(float DeltaTime)
{
	Super::Tick(DeltaTime);

	MovePlatform(DeltaTime);
}

void AMovingPlatform::MovePlatform(float DeltaTime)
{
	FVector CurrentLocation = GetActorLocation();
	CurrentLocation = CurrentLocation + PlatformVelocity * DeltaTime;
	SetActorLocation(CurrentLocation);
	float DistanceMoved = FVector::Dist(StartLocation, CurrentLocation);

	if(DistanceMoved > MoveDistance)
	{
		float OverShoot = DistanceMoved - MoveDistance;
		FString Name = GetName();
		UE_LOG(LogTemp, Display, TEXT("%s Platform overshot by %f"), *Name, OverShoot);
		PlatformVelocity = -PlatformVelocity;
		FVector MoveDirection = PlatformVelocity.GetSafeNormal();
		StartLocation = StartLocation + MoveDirection * MoveDistance;
		SetActorLocation(StartLocation);
	}

}
→ Tick함수에서 사용된 DeltaTime의 값이 MovePlatform의 인자로 전달된다
③ RotatePlatform 함수 정의하기
- MovingPlatform.h에 함수 원형 제공하기
void RotatePlatform(float DeltaTime);
- MovingPlatform.cpp에서 RotatePlatform 함수 정의하기
void AMovingPlatform::RotatePlatform(float DT)
{
	UE_LOG(LogTemp, Display, TEXT("%s Rotating..."), *GetName());
}

Return Statements
반환문 작성하기
① MovingPlatform.h에 bool형 ShouldPlarformReturn 함수 원형 제공하기
bool ShouldPlatformReturn();
② MovingPlatform.cpp에 ShoudlPlarformReturn 함수 정의
bool AMovingPlatform::ShouldPlatformReturn()
{
	float DistanceMoved = FVector::Dist(StartLocation, GetActorLocation());
	return DistanceMoved > MoveDistance;
}
→ 기존 if문 내의 DistanceMoved > MoveDistance를 추상화
③ 기존 MovePlatform 내 코드 정리하기
void AMovingPlatform::MovePlatform(float DeltaTime)
{
	if(ShouldPlatformReturn())
	{
		FVector MoveDirection = PlatformVelocity.GetSafeNormal();
		StartLocation = StartLocation + MoveDirection * MoveDistance;
		SetActorLocation(StartLocation);
		PlatformVelocity = -PlatformVelocity;
	}

	else
	{
		FVector CurrentLocation = GetActorLocation();
		CurrentLocation = CurrentLocation + PlatformVelocity * DeltaTime;
		SetActorLocation(CurrentLocation);
	}
}
④ MovingPlatform.cpp 내 ShouldPlarformReturn의 DistanceMoved 추상화
- 헤더파일에 float형 변수를 return하는 GetDistanceMoved 함수 원형 제공
float GetDistanceMoved();
- cpp파일에 GetDistanceMoved 함수 정의
float AMovingPlatform::GetDistanceMoved()
{
	return FVector::Dist(StartLocation, GetActorLocation());
}
→ ShouldPlatformReturn 함수 코드 재작성
bool AMovingPlatform::ShouldPlatformReturn()
{
	//float DistanceMoved = FVector::Dist(StartLocation, GetActorLocation());
	return GetDistanceMoved() > MoveDistance;
}
Const Member Functions
Member 함수가 다른 클래스의 어떤 상태도 변경하지 않도록 const를 붙인다
① 헤더파일에 선언한 ShouldPlarformReturn,GetDistanceMoved 함수 뒤에 const 붙이기
bool ShouldPlatformReturn() const;
float GetDistanceMoved() const;
② CPP파일에 정의한 함수에도 const 붙이기
bool AMovingPlatform::ShouldPlatformReturn() const
{
	return GetDistanceMoved() > MoveDistance;
}

float AMovingPlatform::GetDistanceMoved() const
{
	return FVector::Dist(StartLocation, GetActorLocation());
}
※ const 함수 내에서는 const인 함수만 사용가능하다
FRotator
회전 변수형 FRotator를 만들어 RotatePlatform 제작하기
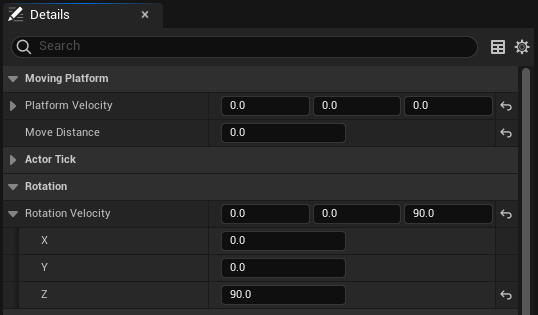
① 헤더파일에 새로운 카테고리 추가 후, FRotator형 변수 RotationVelocity 추가
UPROPERTY(EditAnywhere, Category= "Rotation")
FRotator RotationVelocity;
② CPP파일에 RotatePlatform 함수 정의하기
void AMovingPlatform::RotatePlatform(float DeltaTime)
{
	AddActorLocalRotation(RotationVelocity * DeltaTime);
}
→ 기존 Location방식처럼, Actor의 Location을 받아와서 LocationVelocity값을 그냥 더하는 방식으로는 회전자를 제어할 수 없다. (회전은 데이터 구조상 오버플로우가 발생하기 때문인 것으로 추측됨)
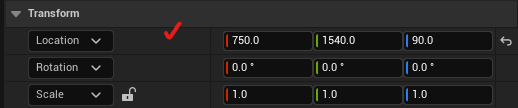
③ 이제 Editor로 돌아가면, MovingPlatform 카테고리 내에 Rotation Velocity가 추가되어 있음을 알 수 있다.

④ Rotation Velocity의 Z값을 90으로 지정한 후 Play
⑤ MovingPlatform Class의 파생 블루 프린트 클래스 생성

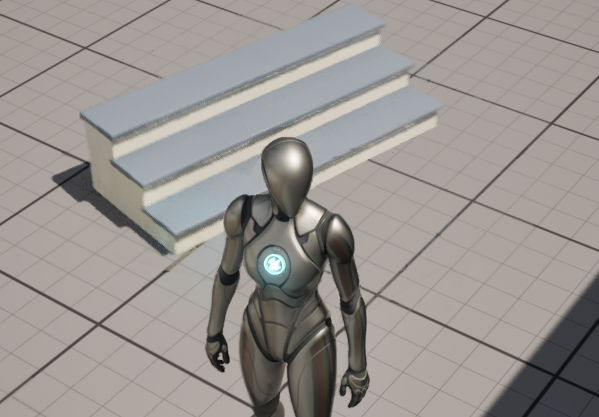
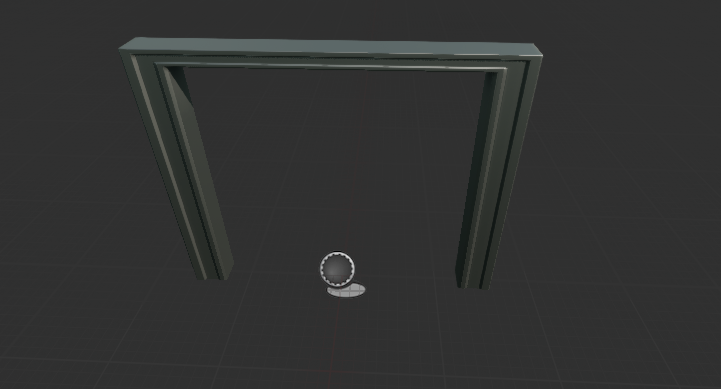
⑥ 해당 블루 프린트 클래스에서 StaticMesh 삽입 후, BP_RotatingPlatform(Self)의 Details 변경
⑦ Play 버튼 클릭
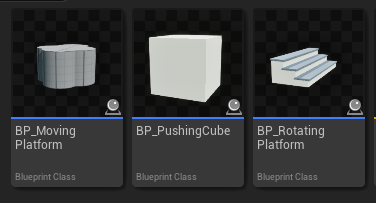
Level Design & Polish
지금까지 제작한 Class들을 활용한 Level Design 하기
▶ 우리가 활용할 수 있는 옵션엔 어떤 것들이 있는가?
- Moving (Up/Down/Left/Right)
- Rotating
- Pushing/Transporting
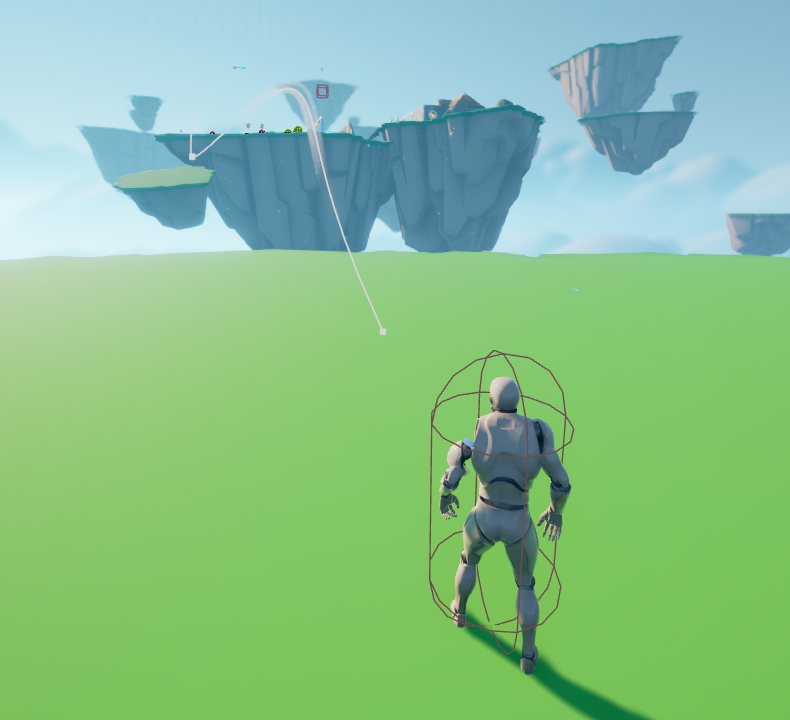
① Level Design 컨셉 계획하기
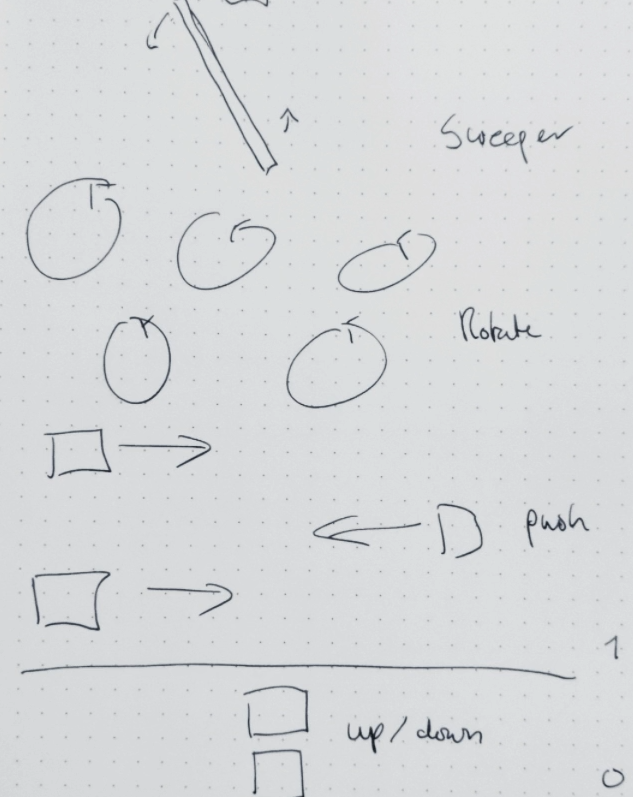
② 실제 맵에 Mesh들 배치하기
옮기고자 하는 위치에 있는 object의 로케이션 값을 복사해서 사용하면 편리하다

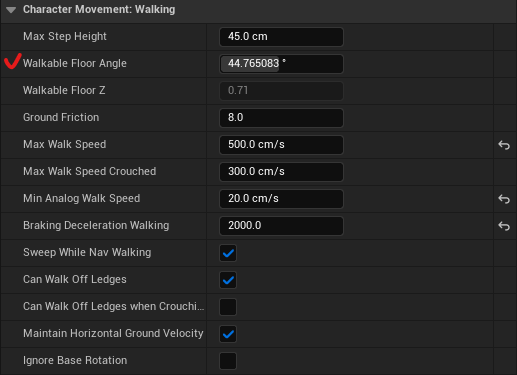
③ 케릭터가 Object를 이동할 수 없을 때 → ThirdPersonCharacter 설정값 변경
- BP_ThirdPersonCharacter 블루 프린트 실행 > Movement > Details
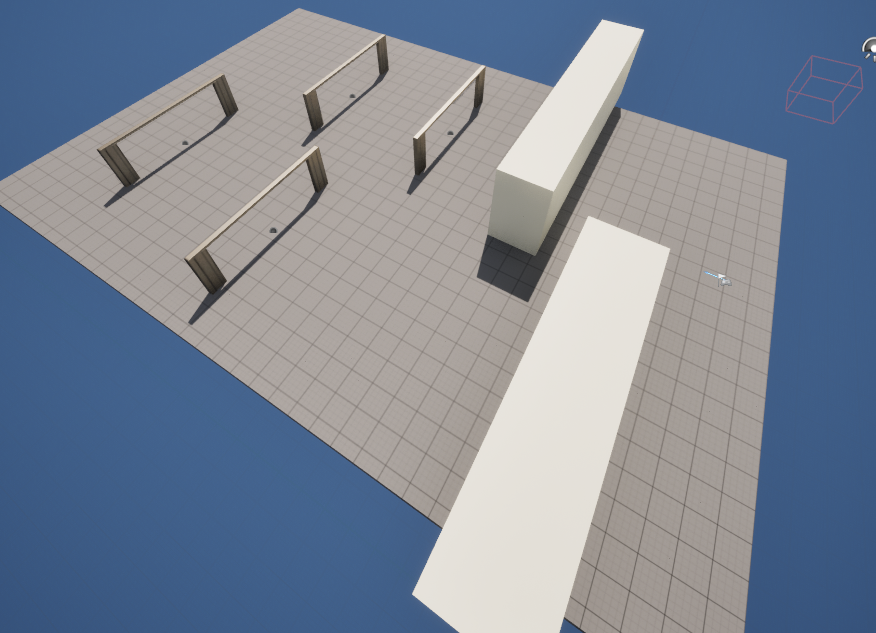
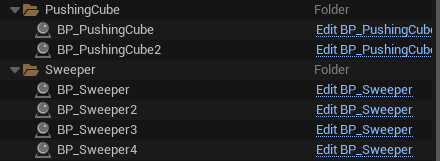
④ 회전하는 MovingPlatform 블루 프린트 하위 Class인 BP_Sweeper 추가하기
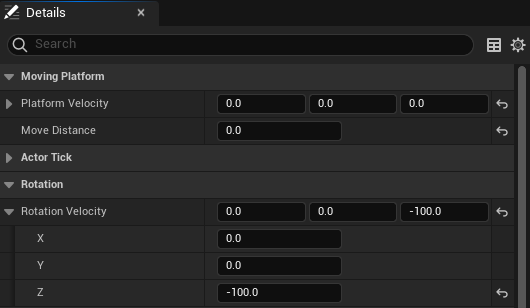
⑤ 컨셉대로 Map에 Object 배치하기
※ Object 폴더 정리 깔끔하게 해주기!
※ 해당 게시글은 개인 학습의 목적으로, 아래 강의를 수강한 후 정리한 학습노트입니다.
'Unreal Engine 5 > Tutorial' 카테고리의 다른 글
| [Unreal Engine 5] 섹션4: Crypt Raider (2) | 2024.04.21 |
|---|---|
| [Unreal Engine 5] 섹션2: 창고 부수기 (1) | 2024.03.30 |
| [Unreal Engine 5] 섹션1: 강좌 소개 및 설치 (0) | 2024.03.25 |